Title here
Summary here
Summary: My first time renting a man lift, what went right, what went sideways, and what I’d do differently so you don’t bury 15,000 pounds in your front yard.
There are two areas on my house where a higher peak sits behind another peak. Because of the height and angles involved, there was no safe way to get there with a ladder without doing something extremely dumb.
I could have saved a lot of money on this install by skipping those two peaks, but that wasn’t an option for me. First because the one in the front is the most visible peak on the whole house, but you need a little backstory for the second reason.
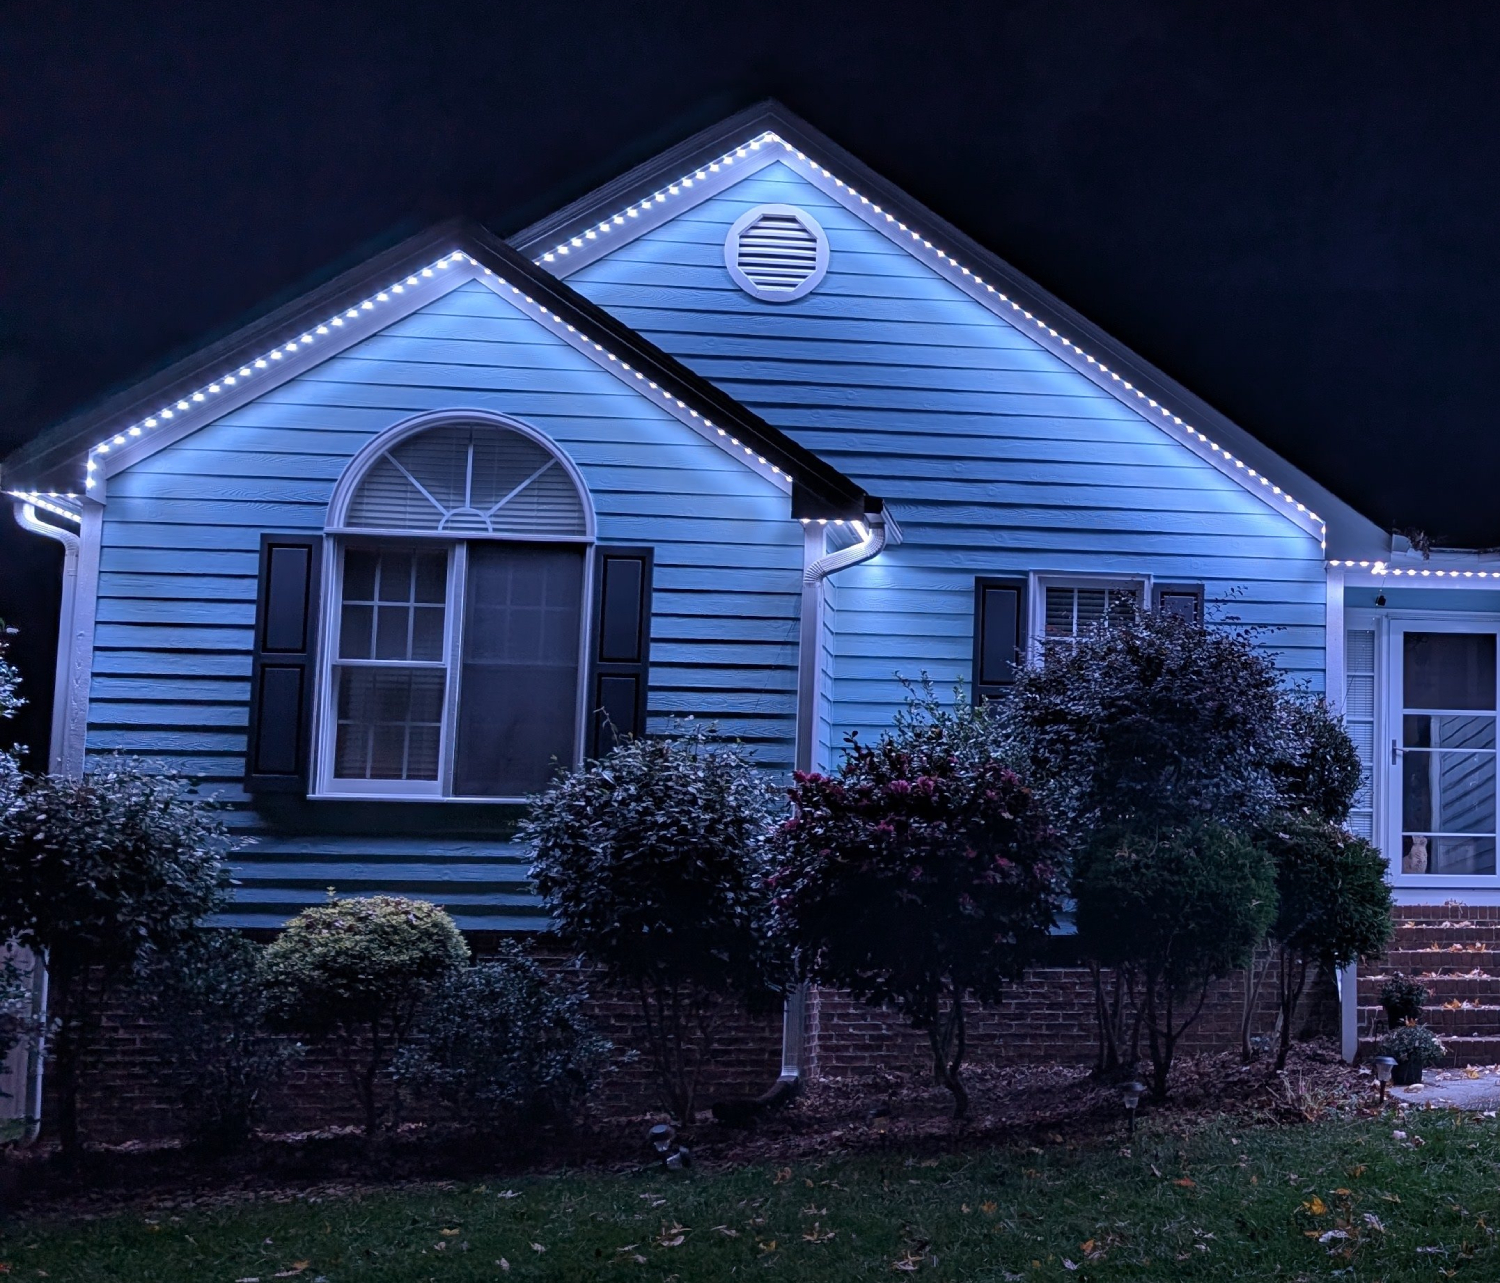
Around 3 years ago I ran a string of the cheap fairy lights (the style where the LED is embedded in the wire) around the whole roofline. But, as we’ve already talked about, I couldn’t reach that one peak. I tried countless different methods to attach the string up there, but all ended up failing. That led to the string just dangling in front of the peak instead of actually following it.
Seeing that string hanging there for years is what pushed me into this whole project in the first place. I wanted to have permanent lights, but I couldn’t stand to look at that saggy string any longer. And there was no way I was renting a lift just to hang a throwaway string again. If I was going to spend the money, it would be for a permanent setup.
I had zero prior experience renting or using heavy equipment like this. So this page is very much “first-timer learns the hard way” territory.
I started by roughly measuring the height of the tallest peak I needed to reach. Then I measured how close I could realistically park a lift to that peak. The peak is set back, and I also have a garden bed and bushes in front of it, so the lift had to sit farther away than you’d think.
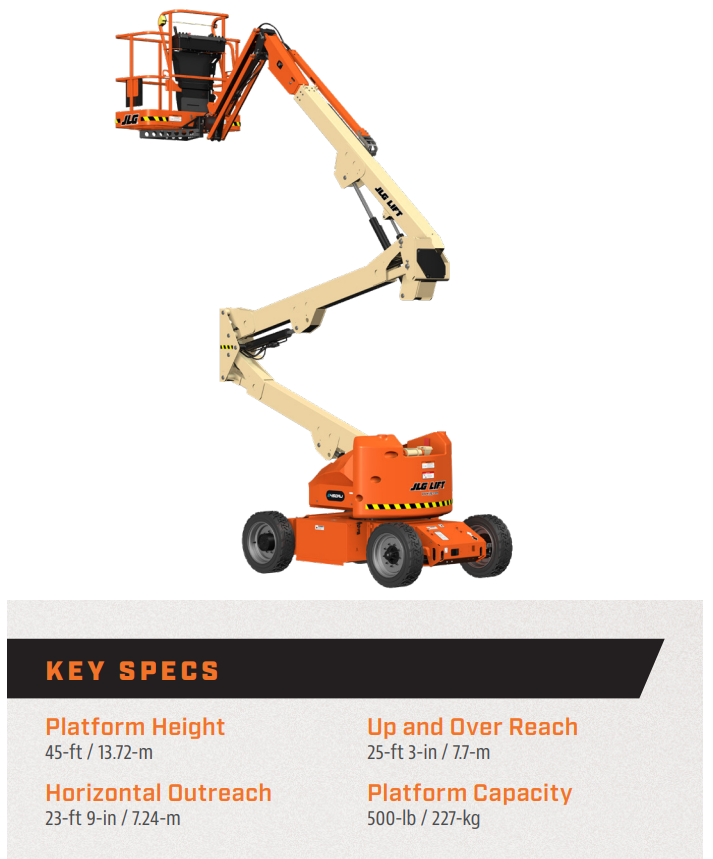
With those numbers in hand, I used basic math to check how far out and how high I’d need to reach. A 45’ articulating lift with a jib looked more than sufficient.
For those who want more detail on that process, here are the important bits.
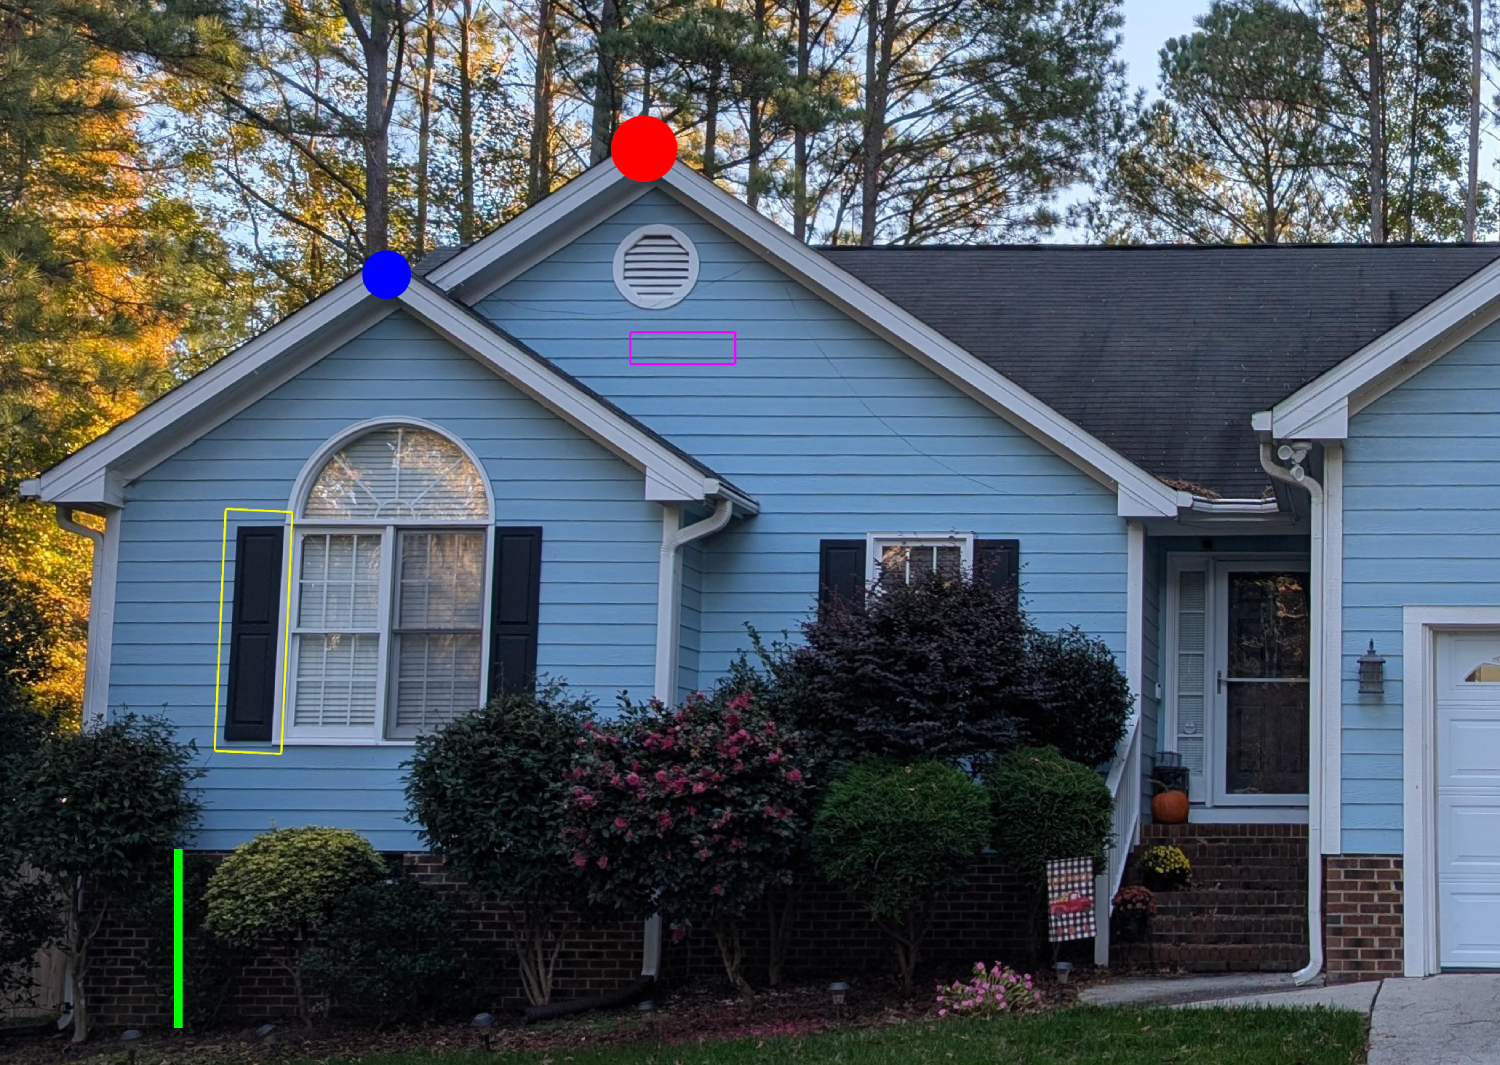
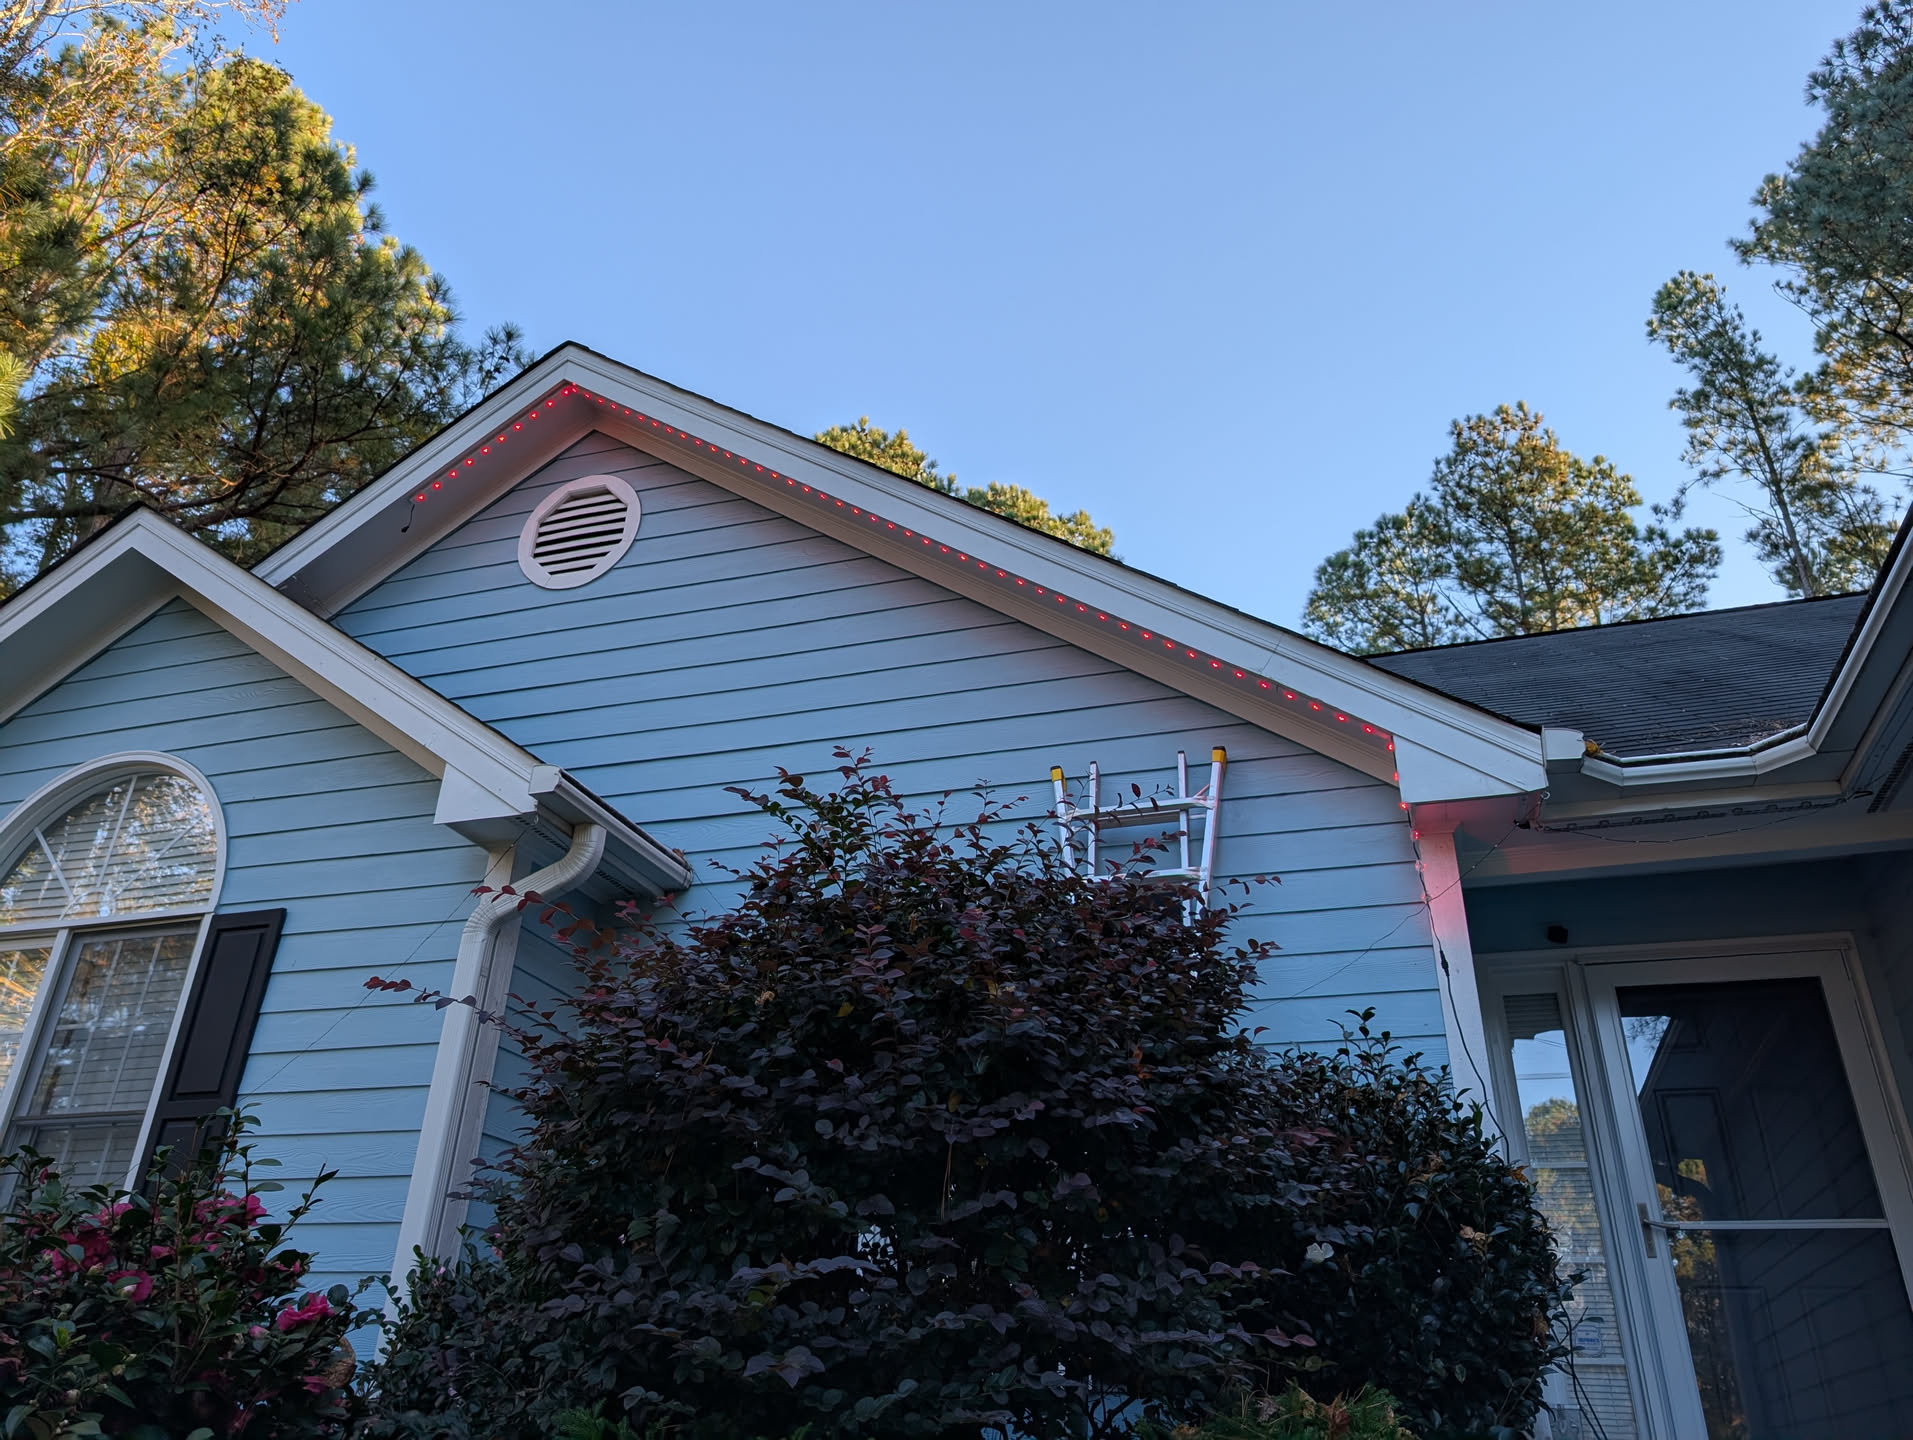
I took this picture of my house and noted the following details:
Using the scale-items I have (green line, shutter, siding) I calculated that there were ~2.827 pixels per real inch (camera angle and distortion impact this which is why I took real-life measurements for a lot of items and then I averaged it all out).
With that I calculated that the front (blue) peak height was ~19 feet high (which I knew was correct) and the rear (red) peak was ~22 feet. I needed the lift’s up-and-over height (more details on that in the next section) to be >19’ so I could clear the front peak. Although realistically I needed more because of the angle of my yard and to give myself some clearance.
All the math said a typical 40’ lift would be enough, but the cost for a 45’ was the exact same so that was my final decision.
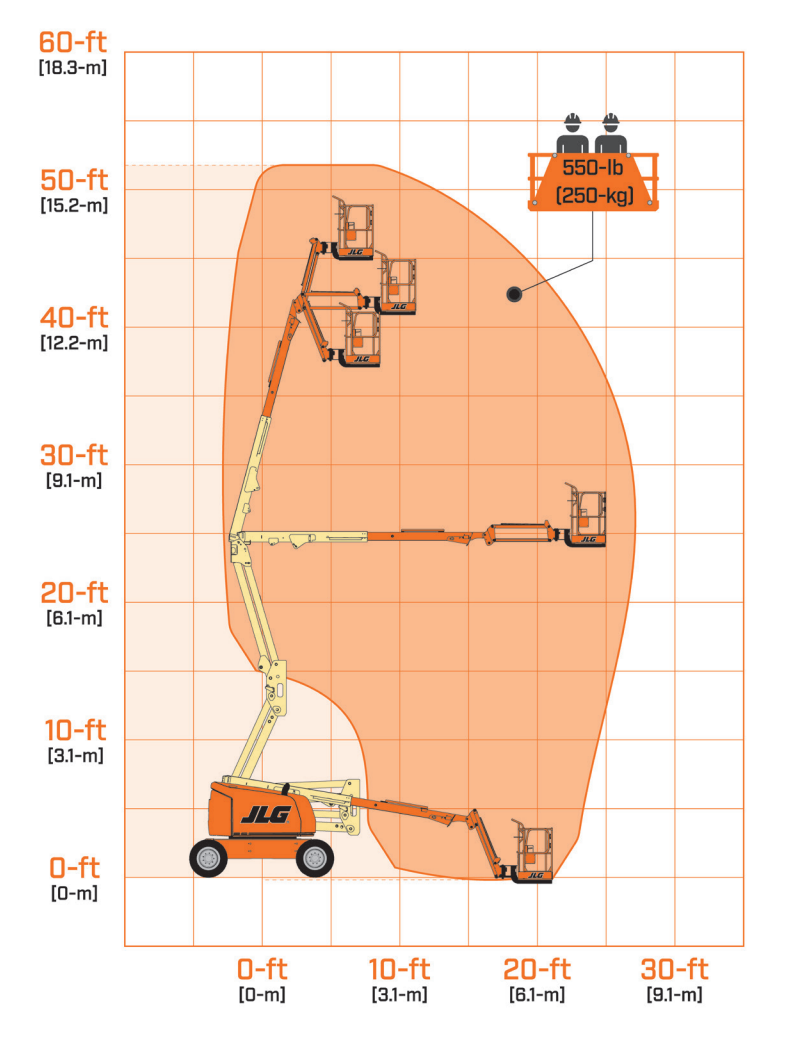
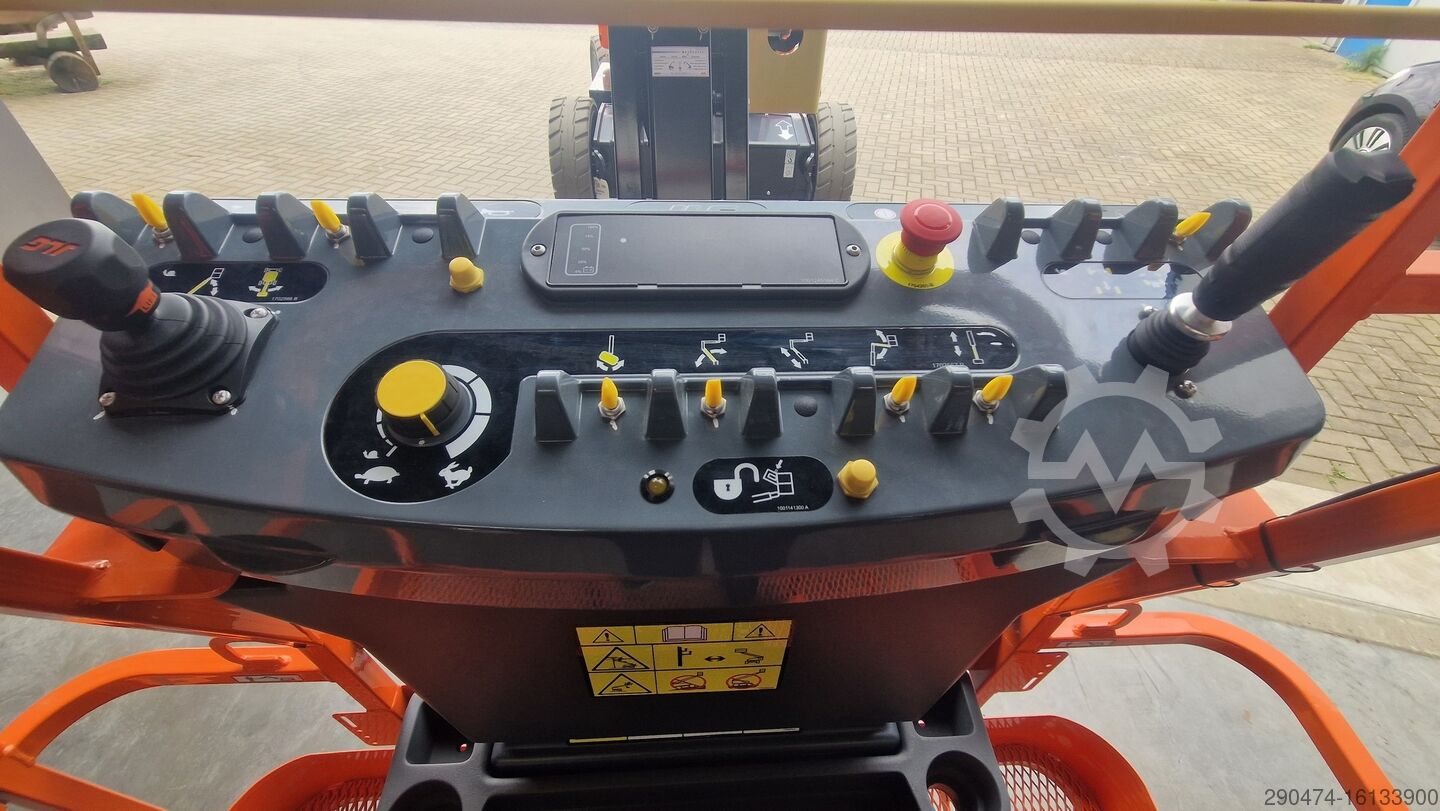
When you’re picking out a lift to rent, there are a few terms you need to understand.
For normal “go straight up and work above a driveway” jobs, platform height is the main thing. For weird soffit access like mine, up-and-over height plus horizontal reach are critical.
The jib (the small articulating arm at the end) matters too. It gives fine control near the working area and lets you sneak into awkward spots instead of constantly repositioning the whole machine.
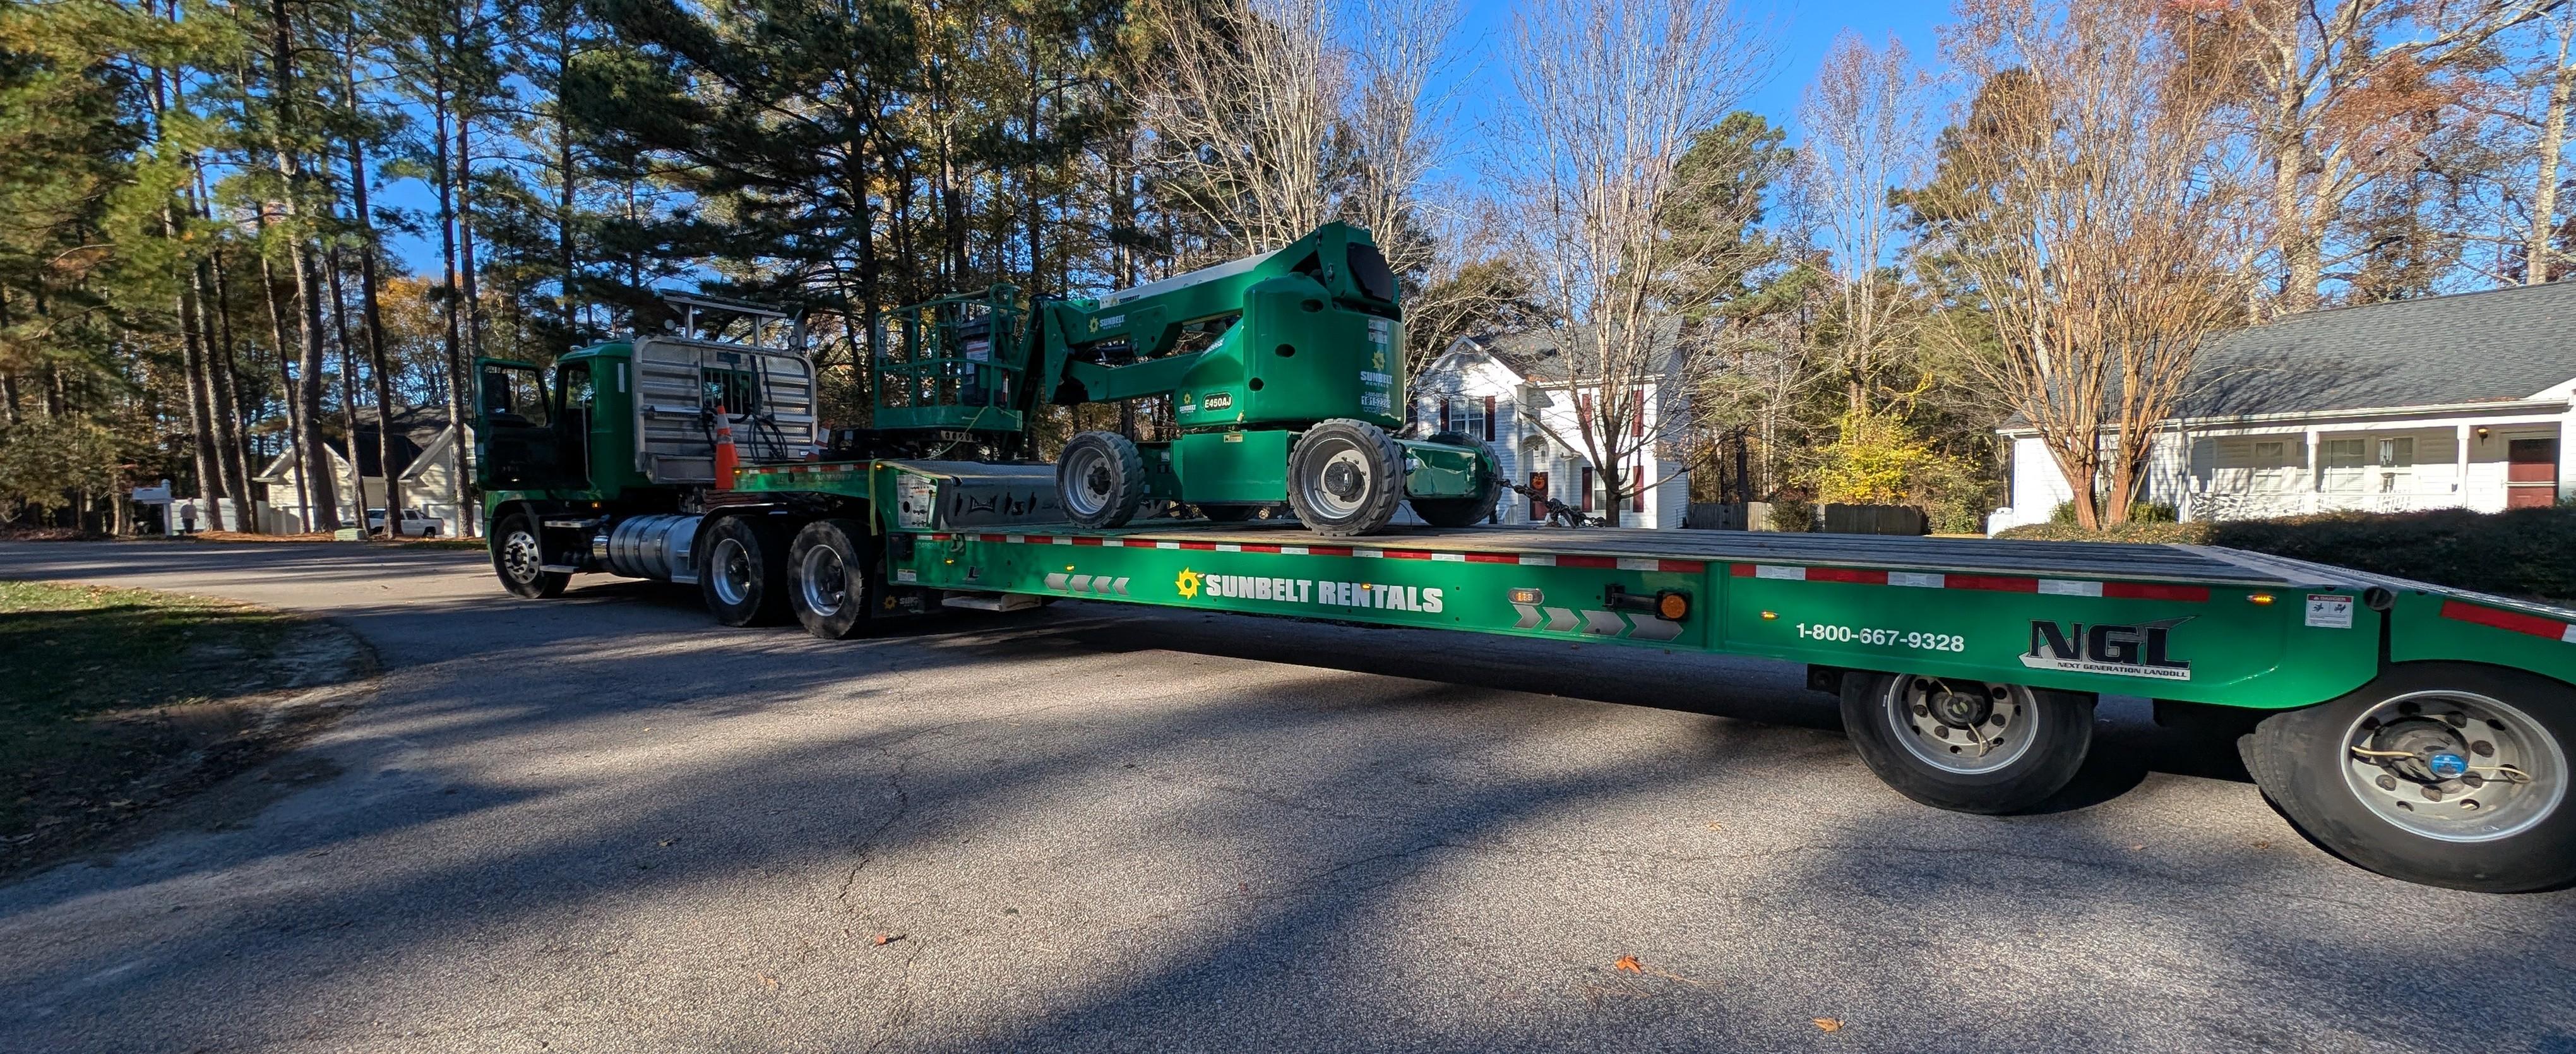
I was going to be using this lift outside so a 4WD gas/diesel-powered unit was the best choice, but it wasn’t what I wanted. I chose an electric one because:
“Quieter” is relative. Be warned that any time you move anything, the lift beeps loudly. Constantly.
The electric model I rented is technically intended for indoor use. It had non-marking solid tires that are fine on flat, compacted surfaces, but aren’t really made for being in the grass due to their minimal tread and low grip. They are rated for outdoor use so I wasn’t doing anything I shouldn’t be, but I knew there was a risk.
At the time I thought “my yard is hard clay, it’ll be fine.”
Narrator: it was not fine.
I rented from Sunbelt. This is not an ad (man I wish it was, that would have saved me a lot of money), but I have to say that they made a potentially intimidating process pretty easy. I don’t know if all Sunbelts are like this, but I would for sure go back to mine.
The person on the phone helped me pick the right size lift and answered my “first-timer” questions without making me feel dumb. I usually like to figure things out myself, but in this case the risk of picking the wrong machine or misusing it is high enough that it’s worth asking a lot of questions early.
When the driver delivered the lift, I asked if he could give me a 60 second tutorial on using it. I had no idea if that was something he’d be able or willing to do, but I gave it a shot. I hadn’t watched a video or anything because I wasn’t sure what model they would actually deliver and I didn’t want to learn something wrong in advance.
He was so incredibly helpful and completely happy to help. He basically said, “I’ll stay as long as you need.” He walked me through:
He also gave me his number and said to call if I got stuck (no pun intended; although foreshadowing intensifies). That kind of support made a huge difference in my comfort level.
I booked a one-day rental because:
With Sunbelt, if you go over your original time, they just keep billing you until you call and schedule pickup. There is no obligation to return it after one day even if that’s what you told them you wanted. You keep it as long as you need and then give them a call when you’re done, then they’ll come pick it up when they can.
In my case, I actually wanted them to take their time picking it up so I could sneak in more work. But of course… they came a few hours after I called.
The best thing you can do is drive the lift around and play with the controls somewhere safe. I took a few passes around the street and driveway before I tried to park it near the house.

Things that felt awkward at first:
At first I felt like Bambi on ice. I’d overshoot the spot, swing too far, or end up a few feet away from where I needed to be. But once I got comfortable with which joystick did what, and how the jib interacted with the main boom, I could move along the roofline pretty quickly.
A recurring theme: I’d think “the platform just won’t go there,” but if I was within the rated reach envelope, it absolutely could go there. I was just struggling to find the right combination of things to move. It’s a coordinated dance between:
If the lift is not preventing you with an alarm or lockout, it’s usually a control problem, not a reach problem. Look at your control panel and make sure you’re actually using all your different articulating options. You’ll get there eventually.
The controls are on the basket facing away from the roofline, so you’re frequently looking over your shoulder at the house while manipulating controls you can’t see.
A second person on the ground is incredibly helpful:
Even though the front peak was my main goal, I started on the right side of the house as a safer test area. That side also has the same peak-behind-a-peak that required the lift to reach, but it was easier to access and had fewer obstacles.
I spent the first few hours getting comfortable with driving the lift, figuring out the controls to get exactly where I needed to be, moving along the soffit line, and figuring out my rhythm and install process now that I was on a flat platform instead of standing on a ladder.
That side took about four hours, mostly because I was still learning. Considering the experience and confidence I gained by the end of the day, I could have easily done that same area in under an hour if I had to. But again, it was new and I was learning.

Once the right side was done, it was time to move to the front yard. This is where things went down (heh).
I drove the lift from the grass on the right side of the house, across the driveway, and started heading into the grass on the left side of the driveway towards the main peak on the front of the house.
The drive wheels dug in and immediately started spinning. Two-wheel drive plus soft-ish soil plus a 15,000 pound machine is not a great combo. The tires were doing nothing but digging ruts. Having an actual 4WD lift with proper outdoor tires would have been amazing right in this moment.
At that point I was picturing wasted rental time, embarrassing phone calls (“why didn’t you rent the 4WD diesel powered one?”), and an expensive bill for recovery service. Unless I could find a friend with a truck that could pull 15,000lbs out of the ground.
Most of my yard is hard clay which is why I didn’t have any problems on the right side. The issue is that the front yard used to have large trees (long before we owned the house). They were removed and grassed over a very long time ago, but the soil there never compacted like the rest. I knew ground conditions were a risk but my earlier success on the side yard gave me confidence.
I figured I might as well try to free it as long as I wasn’t making things worse. I had some scrap wood in the garage, so we started by wedging pieces in front of each tire.
To my surprise, that worked almost immediately. The lift drove itself up and out of the ruts. We were still close enough to the driveway that with a bit of shuffling, we got it back onto solid ground without drama. That turned a “I’m screwed” moment into a “ok, that actually wasn’t bad” moment pretty quickly.
But I still had a problem: I needed the lift in the yard, and the yard was clearly too soft to support it directly. There was NO WAY I was going to leave that front peak without lights.
When the delivery driver dropped the lift off he actually told me that if I have problems with the grass then I should get plywood. That was my plan already, but him saying it helped me jump straight in to action instead of trying to decide if there were better options.
By this point it was already around 3:30 PM. Sunset was a little after 5 PM thanks to winter so I didn’t have much time. I needed a way to get the lift into position and leveled before dark.
I took my wife’s CR-V (our biggest vehicle) to Home Depot to find some plywood.
What I needed:
I ended up with three sheets of 23/32" (3/4" nominal) 4x8 BC sanded pine plywood. This was potentially overkill… there were plenty of sheets that were less than half as expensive as these, but I needed it to work the first time.
OSB subfloor or MDF would have been the wrong choice in my climate. The ground is relatively wet here and the boards were damp by the time we were done. OSB can swell and delaminate quickly when wet and MDF would have swollen up like a sponge then disintegrated or snapped. So the wood I got needed to be made with exterior-rated glue to prevent it from delaminating when it inevitably got wet. And going too thin would have risked it just snapping immediately.
If you aren’t familiar with the Honda CR-V… just know that it can’t fit full size plywood sheets (or even half size). But it’s much bigger than my car. If I had a pickup truck this would have been trivial, but I worked with what I had. Thankfully I thought ahead and brought a saw and several batteries with me. I know Home Depot can cut wood for you, but I never seem to be able to find an employee for the saw when I need one. And there was a chance it would be broken or unavailable for whatever reason.
I parked at the back of the lot and cut each sheet into four pieces. That gave me a total of twelve 2x4 panels. That size was small enough to fit in the back of the CR-V and small enough for my wife to move around easily, but large enough to distribute the load under each tire and not simply break.
Was it fun? Not really. But it worked… eventually.
I accidentally had a very high tooth finishing blade in the saw which was making the cuts take forever and was draining the battery quickly. I should have just gone back inside Home Depot and bought a new blade, but I was being stubborn. Plus I’d have to just leave the plywood sitting out at the back of the parking lot while I went in. Regardless, it did the job.
Once I got back home, we used them as “tracks” to get the lift across the grass:
It was a slow, tiring process. But we got it done. My wife did most of the board repositioning while I focused on driving and making sure the tires stayed on the wood. I’ll never be able to thank her enough.
The good news: it worked flawlessly. The lift stayed on the plywood, never sank, and we got it into the exact working location we needed.
Only later did I learn that Sunbelt rents rubber ground protection mats specifically for this. I genuinely did not know that when I booked the lift.
That said, I don’t know anything about them. The mats might be heavy and annoying to move without proper equipment. I don’t have personal experience with them. If you do, please reach out and let me know if the mats are moveable by a normal human and I’ll update this section.
The lift itself won’t work if it senses that the base is at too much of an angle. My front yard slopes in two directions, which didn’t help.
We ended up using the plywood for leveling too. For example: if we needed the left side higher we would put only one board under each tire on the right side, but put 2-3 in a stack under each left side tire. That let us “shim” the lift until it was within its allowable tilt range. Once the tilt alarm was happy, all the functions came online
I was worried we’d go through all this effort, get the lift into position, and then discover the slope was just too much to fix. Thankfully, the combination of stacking boards, careful placement of the lift, and a bit of luck kept us within limits.
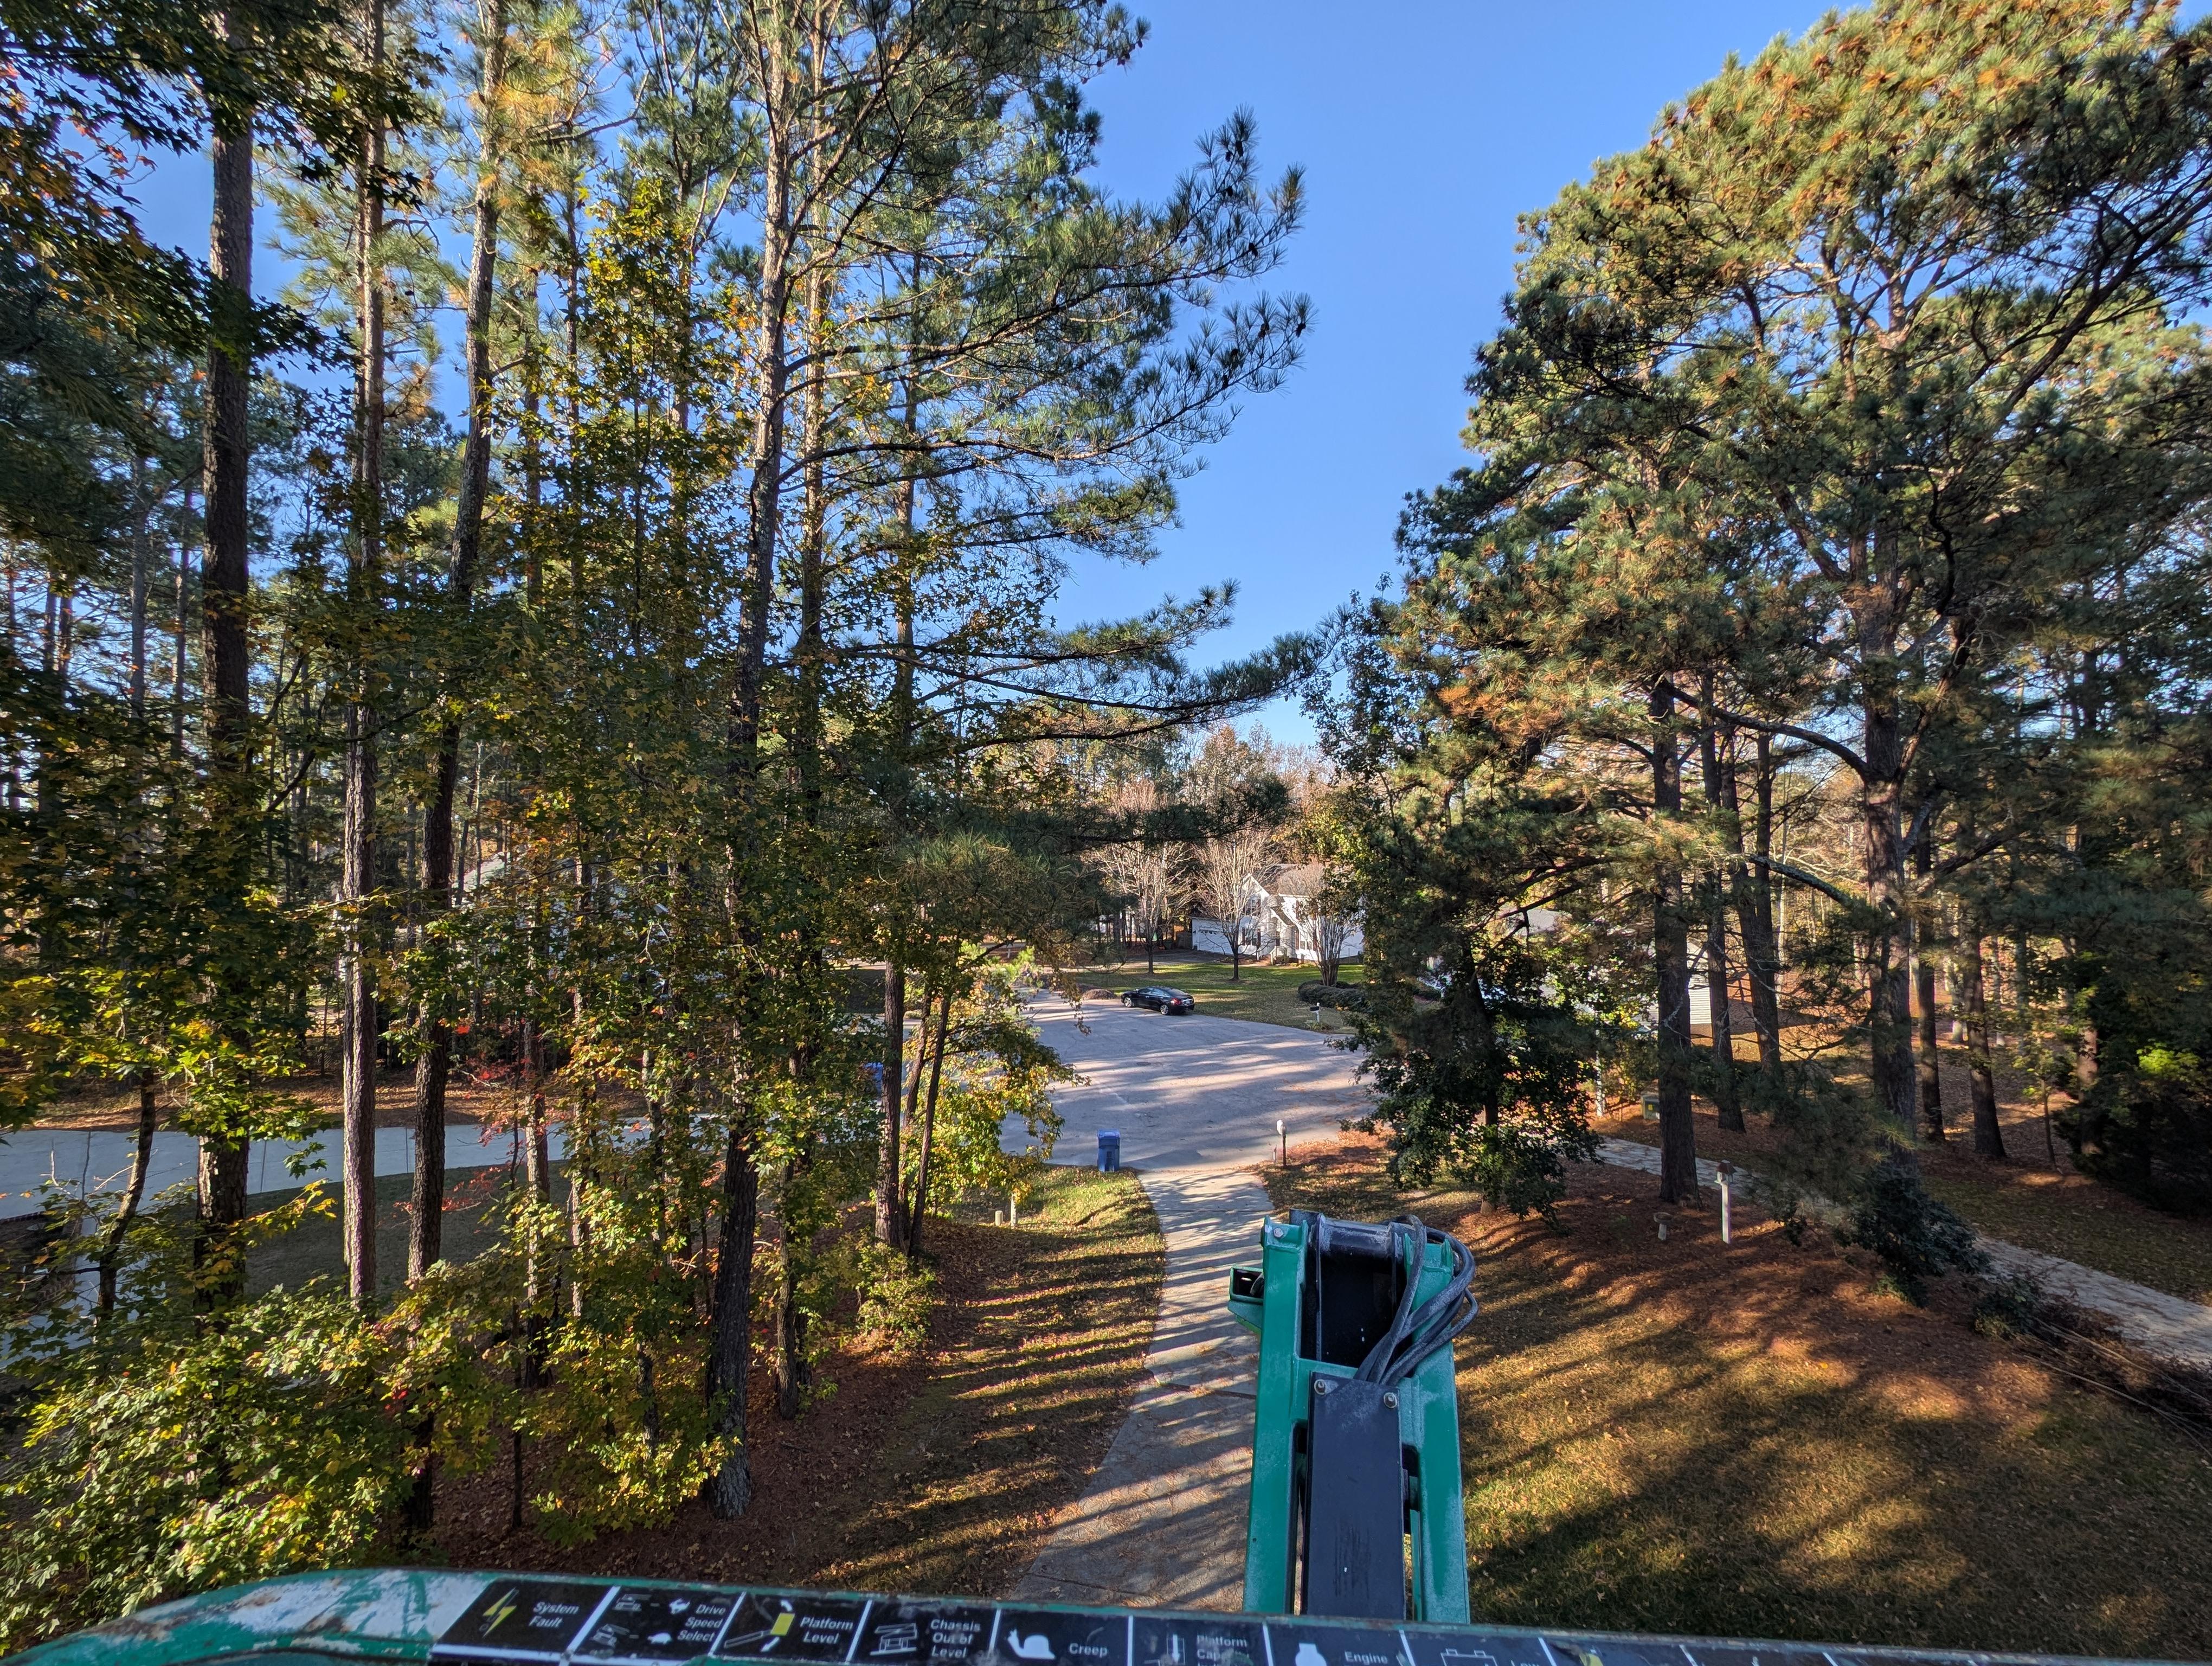
By the time all the plywood shuffling and leveling was done, the sun was gone. I ended up finishing the impossible-to-reach front peak with a headlamp in the dark. Temperatures were below freezing the whole day and the winds were gusting 30+ mph, but I NEEDED that peak to be done.
And let me tell you… the platform moves and sways a lot even without the wind. And the further you extend away from the base, the more it bounces and moves. This spot put me right at the max distance of what the lift could do for horizontal and up-and-over reach so it was really swinging.
Despite all that, I never felt unsafe. The base of the lift always felt firmly planted. The sway is unnerving at first but you stop noticing it after a while. In fact, it felt weird to be on steady ground by the time I was done that night. I was experiencing the same sensation that you do after you’ve gotten off a long boat ride; things were moving even though I was still.
The next morning my wife was back to work, but I used the lift a bit more on sections I could reach while it sat safely on the driveway. I didn’t dare take it back onto the grass alone. Moving the plywood while also driving the lift was too risky, and dropping a wheel off the boards would have buried it again.
After that, I called it. I was at my 24 hours and there was nothing else I could really accomplish in reasonable time. I tested the front peak to make sure it worked, but then that was it. I could have kept the lift longer and paid for more time, but the weather and schedule didn’t line up with any extra opportunities to use it, so I had it picked up.
I’m a generally cautious person. I wear a mask for dusty work, hearing protection for noisy work, and eye protection when cutting or grinding (I’m not perfect with that one, but I’m trying).
Naturally I bought a fall protection hardness for the lift. But… I didn’t end up using it.
Here’s why:
For what it’s worth, the harness I bought seems extremely solid and well-built. Especially for the price. I just didn’t end up in a scenario where I felt it would meaningfully help me.
If I had to summarize the main lessons from renting and using the lift:
This may be surprising, but I honestly don’t think I would have changed which lift I got despite the problems I had. There’s no question that the 4WD combustion lift is the right lift for my purposes, so that’s probably what you should get. But the convenience and relative silence of the electric one is just too good to pass up. I simply would have been more prepared by getting the ground protection mats or having the plywood ready-to-go ahead of time.
I probably should have done a weekend rental so I could have used it more though. That’s the main thing I would have changed about this whole process.
It would have been less stressful and I would have saved a ton of time compared to what using a ladder has taken. Like I said it didn’t really work with our calendar and the weather, but if I planned sooner then I could have made it work. It obviously wouldn’t have changed the delivery cost which was a huge chunk of the total cost, and I don’t think it automatically adds 2 full days by having it on Saturday and Sunday. I believe Sunbelt offers a deal (or maybe doesn’t charge anything at all) to keep it over the weekend as long as they don’t need it on another job.


