Summary: Pitch helped me estimate material needs, map the real roofline, and decide early that I'd need a lift for some of the higher peaks.
🛑 This guide is a major work-in-progress. There are missing details, missing pictures, missing articles, and it isn't properly organized in a lot of places. I'm continuing to update it daily, but I've decided to publish what I have so the community can start giving input.
This page was last updated: December 19, 2025 @ 3:01 PM
Why Roof Pitch Even Came Up
The thing that pushed me into this whole project was my old string lights. They ran straight across the tops of the peaks instead of following the actual roofline. It looked fine from a distance but once you noticed it, you couldn’t un-see it. I wanted lights that matched the angles of my house cleanly.
To get that right, I needed to know the pitch of every peak. Not because I planned anything fancy with angles, but because I needed accurate lengths so that I knew how many lights to order. You can eyeball fascia runs from the ground, but the slopes can throw you off pretty badly… or so I thought.
🧮
Spoiler alert: It turns out that while the peaks look dramatic (so I assumed they're adding a ton of length), they really aren't. Once I ran the numbers, the extra distance was a lot less than I thought.
Measuring My Roof Pitch (and Roofline Length) From the Ground
There’s probably an easier method to do this, but here’s what worked for me.
Pitch
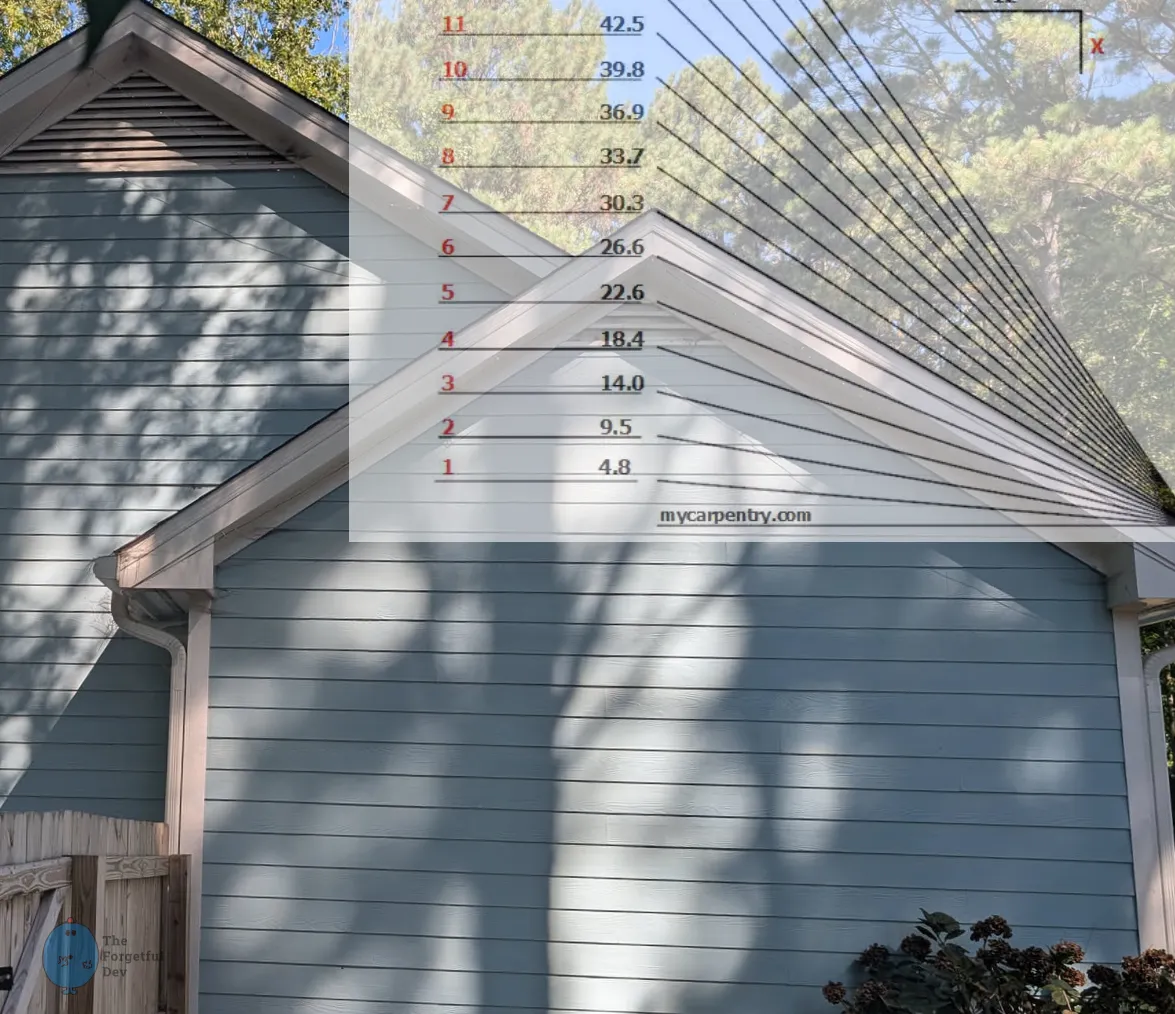
I took a straight-on photo of each peak on my house
Straight-on is important, but so is stepping back from it. Your camera will have a parallax effect that can skew the shape. When shape accuracy is important, you want to step far back and take the picture, then crop it later.
Opened the photo in Photopea and adjusted it so the siding was level (teal line in photo below is level)
Overlayed a roof pitch chart (source) and lowered the opacity so I could see my roof through the pic
Moved the guide up and down until I found which pitch matched mine
It isn’t necessary for it to match EXACTLY; there will be distortion from the picture and stuff. But it will be real obvious that the one above and one below is wrong.
This is certainly not the most accurate way to calculate this, but it was close enough for what I needed.
Measuring the pitch on one of my peaks.
As you can tell from the picture above, this peak is a 7:12 pitch, which means it’s at a 30.3° angle. We’ll use that number soon.
💡
If you have multiple peaks then you should check them all. My house has a total of 7 and they were a mix of 8:12 and 7:12.
Length
Measuring the length itself was easy. I simply took a notebook and tape measure and measured along the ground. I took note to measure where peaks started and ended so I could calculate their total length later, but this is also when I measured all the straight sections as well. I kept everything separated by peak vs not and what side of the house I was on so I could combine them all in the next step.
Calculating My Roofline Length
I now had everything I needed to calculate my total length: I had straight measurements all the way around, I had the pitch and degree angle of the peaks, and I had the horizontal distance that the peaks covered. I could do the math to calculate it all, but I decided to let CAD do the math for me.
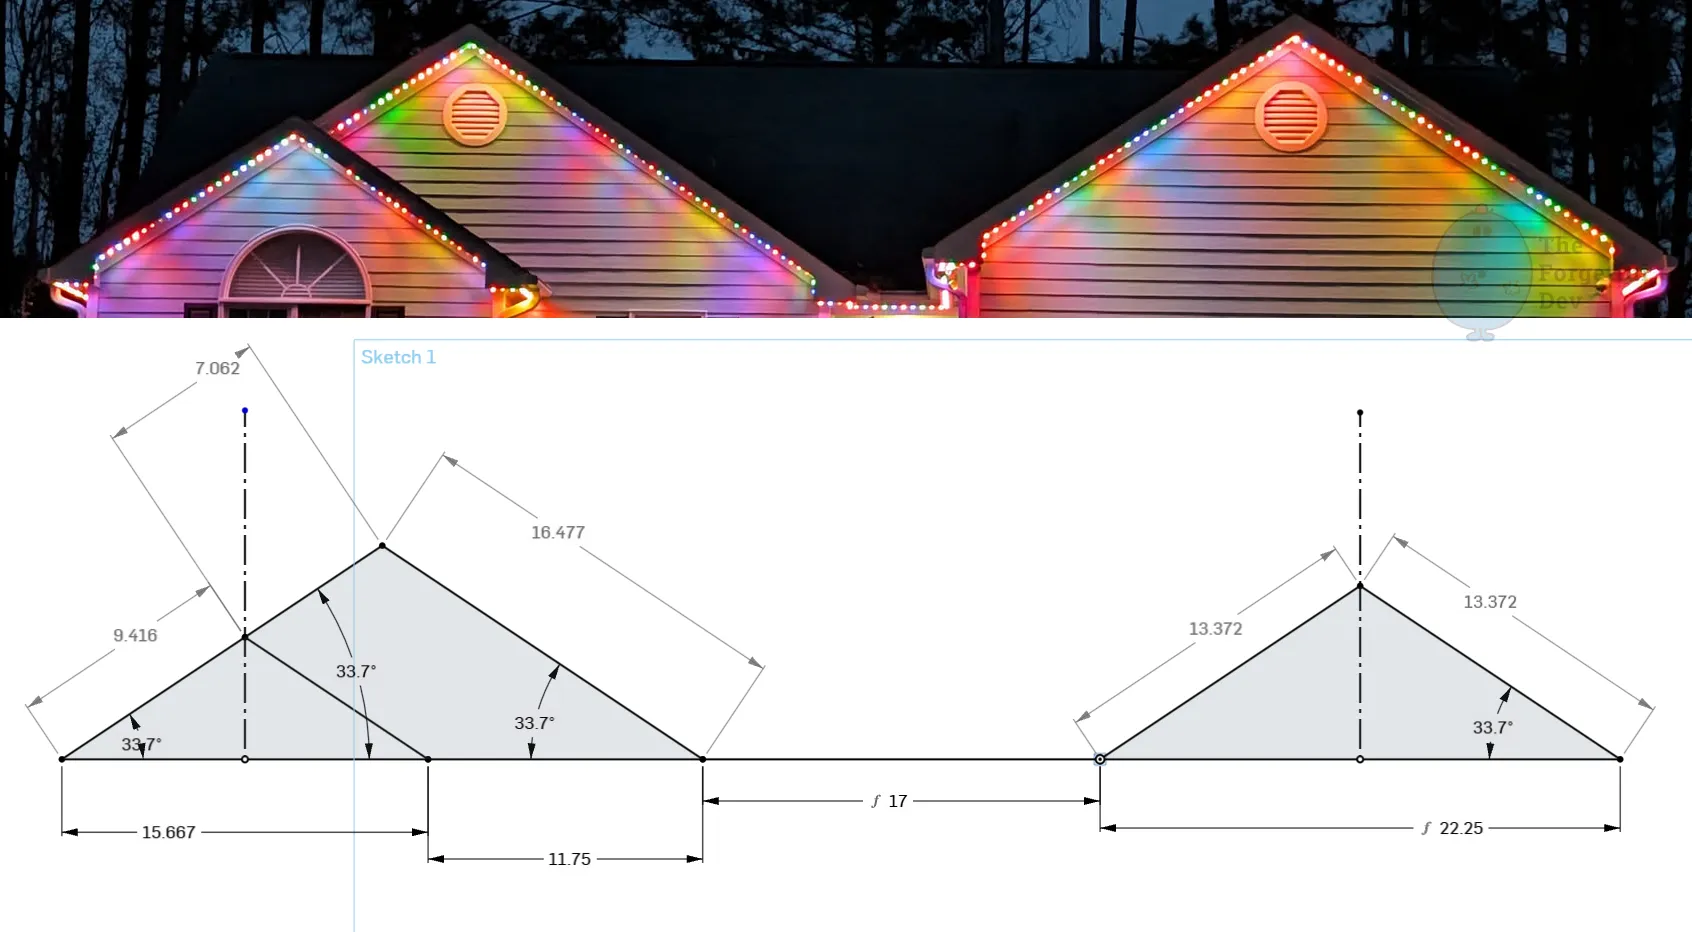
I jumped in to onshape and simply made a 2d line drawing using the measurements I had taken.
My roof vs the CAD line drawing
Steps
I began at one side and drew a line that was as long as the horizontal distance that the peak covered
I then bisected that line (in half, because the peak would be in the middle) and drew a line straight up
I then drew a line at an angle from the start of the horizontal line until it connected to my vertical line, then I set the angle of that line to the degree angle of my roof
In this drawing it’s set to 33.7° because this gable is 8:12. I told you my peaks were a mix of both
I then drew a line from that same spot on the vertical line down to the end of my horizontal line (this should be a mirror of the first angled line you drew because it represents the other side of the gable)
I have a projecting cross-gable roof (the reason I needed to rent a lift) so my drawing looks a bit extra complicated
For straight sections I just drew a line until I got to the next gable, then I repeated the process
For areas like my front entry where the roof comes towards the house but remains flat without any peaks, I just continued drawing my line straight across. I could have represented that in my CAD drawing but it seemed unnecessary.
That’s it! I was now able to use the measurements within CAD to see the total roofline length, including the amount that is added by the gables.
Why Bother?
💡
Knowing the total linear distance drove everything else, from how many pucks to order to how much wire and track I'd need. If you're planning your own system, I'd recommend doing some version of this. It saves you from overbuying by 50 feet because the peaks "looked long."
There were two main reasons I wanted my measurements to be this accurate.
With the cost of importing things to the US from China at the moment, I didn’t want to do this whole project and then wind up 20 feet short or something. The cost to get that little bit more would have been ridiculous.
I also used these lengths to plan my segment start/end spots and my wire injection locations. Being able to quickly reference lengths in CAD made that easy.
What I Learned
The pitch is worth measuring so you know, but it didn’t make nearly as much of a difference as I thought. It makes sense when you do the math and look at it on paper, but from the ground it seems like they would add a lot.
To use my garage as an example: the horizontal distance from the left side of the peak to the right side of the peak is 22.25’. The actual total roofline in that spot is 26.75’. In my eyes the gable peak looks super high and like it would add a ton to the roofline length, but the reality is it only added 4.5'.
I still think it’s worth measuring and having though.