Title here
Summary here
Summary: I ditched my old string lights and went all-in on DIY permanent puck lights for my roofline. Here's what they are, why I chose them, how I installed them, and lessons I learned.
This is a guide written about how I installed permanent outdoor puck lights on my house, control them via WLED, and integrated them in to Home Assistant.
I cover everything from what I bought, what everything cost, how I did it, and what I would do different. This is written so others can read, learn, follow it, and complete their own install, but I can’t stress enough that this is about how I did mine. It isn’t intended to walk you through every single install scenario for every house.
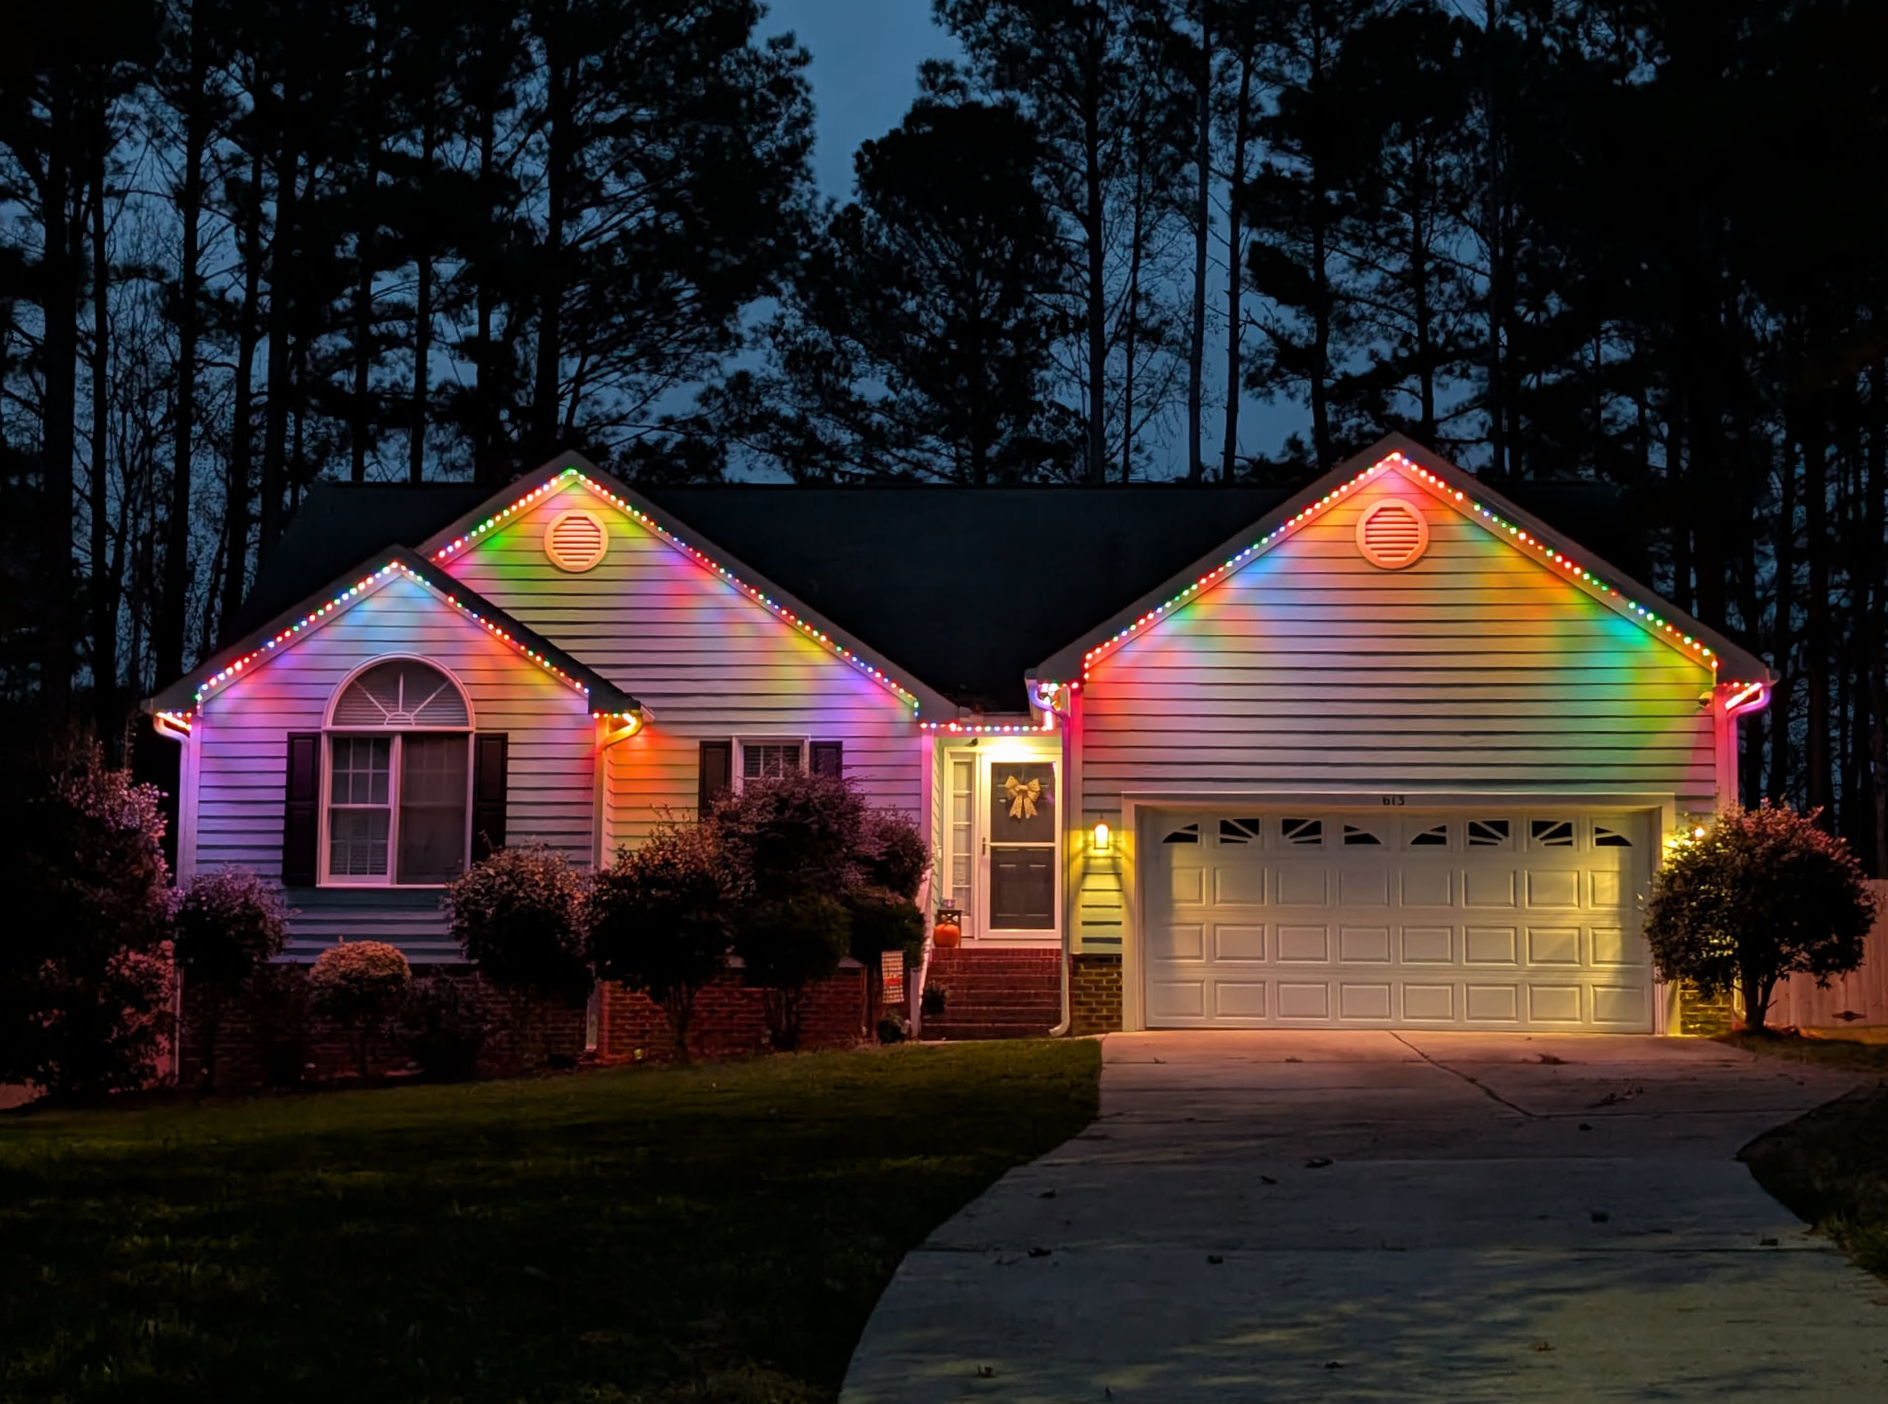
When you hear “puck lights,” you might picture those little stick‑on battery lights sold for closets. These aren’t those. The puck lights we’re talking about here are small, sealed, individually addressable RGB(W) LEDs designed for permanent outdoor installs. They’re meant to live under your soffit year‑round, shrug off weather, and give you that clean dotted‑light look you’ve probably seen on newer houses.
Compared to traditional string lights, puck lights mount in fixed positions and point straight down. That makes them look much more intentional instead of like you zip‑tied your Christmas decorations to the house and forgot to take them down.
Before I installed puck lights I had a cheap string of outdoor LEDs hooked under the eaves. They looked decent enough at night, but during the day it screamed “temporary project that became permanent.” Even worse… they didn’t actually follow my roofline correctly. More on that story later.
When I started researching replacements, I kept running into pictures of soffit puck installs. They looked clean, modern, and built to last. The more I looked, the more I wanted that look for my own house. They checked every box:
Depending on placement, you can choose a subtle dotted light pattern, a soft glow on the wall, or a full‑on holiday light show. Same hardware, you just choose brightness and spacing to taste.
Govee makes a good set of permanent outdoor lights. No shame if you go that route. But I wanted something I could fully control and repair without waiting on a company or dealing with cloud services.
Going with WLED‑compatible puck lights gave me:
I have nothing against Govee at all – they make nice stuff – but I wanted a system built for tinkering and long‑term reliability. Going the DIY WLED route gave me exactly that.
Next up we’ll talk about what this guide is (and isn’t).
