Summary: Before you cut or drill anything, you need a mental model of how these parts constrain each other.
🛑 This guide is a major work-in-progress. There are missing details, missing pictures, missing articles, and it isn't properly organized in a lot of places. I'm continuing to update it daily, but I've decided to publish what I have so the community can start giving input.
This page was last updated: December 19, 2025 @ 3:01 PM
Thinking Ahead
You’ve created a plan and ordered all your parts, and you’re ready to start installing. But there’s still a number of things to understand before you start.
You can follow installation steps perfectly and still end up stuck if you don’t understand how the various parts of the system all interact. This section helps paint the full picture so you can prevent problems before they happen.
Track Terminology (Quick but Important)
The tracks come in two pieces that snap together. Talking about them gets confusing fast if we don’t name the pieces clearly. Here’s what I settled on for the two halves:
Base track – screwed into the soffit
Puck track – holds the lights and snaps into the base
This avoids describing the pieces as “top” and “bottom” which is difficult to understand. Especially once you flip the tracks over to install them.
I will also use inside to describe the sides that becomes the interior (where the wires live) once you have snapped the two tracks together, and outside to describe the exposed faces.
That may all sound obvious but again, it’s a problem when “the track” can refer to either one of the two pieces, or the whole thing. Ok, I’m rambling. I did warn you about that. Let’s continue!
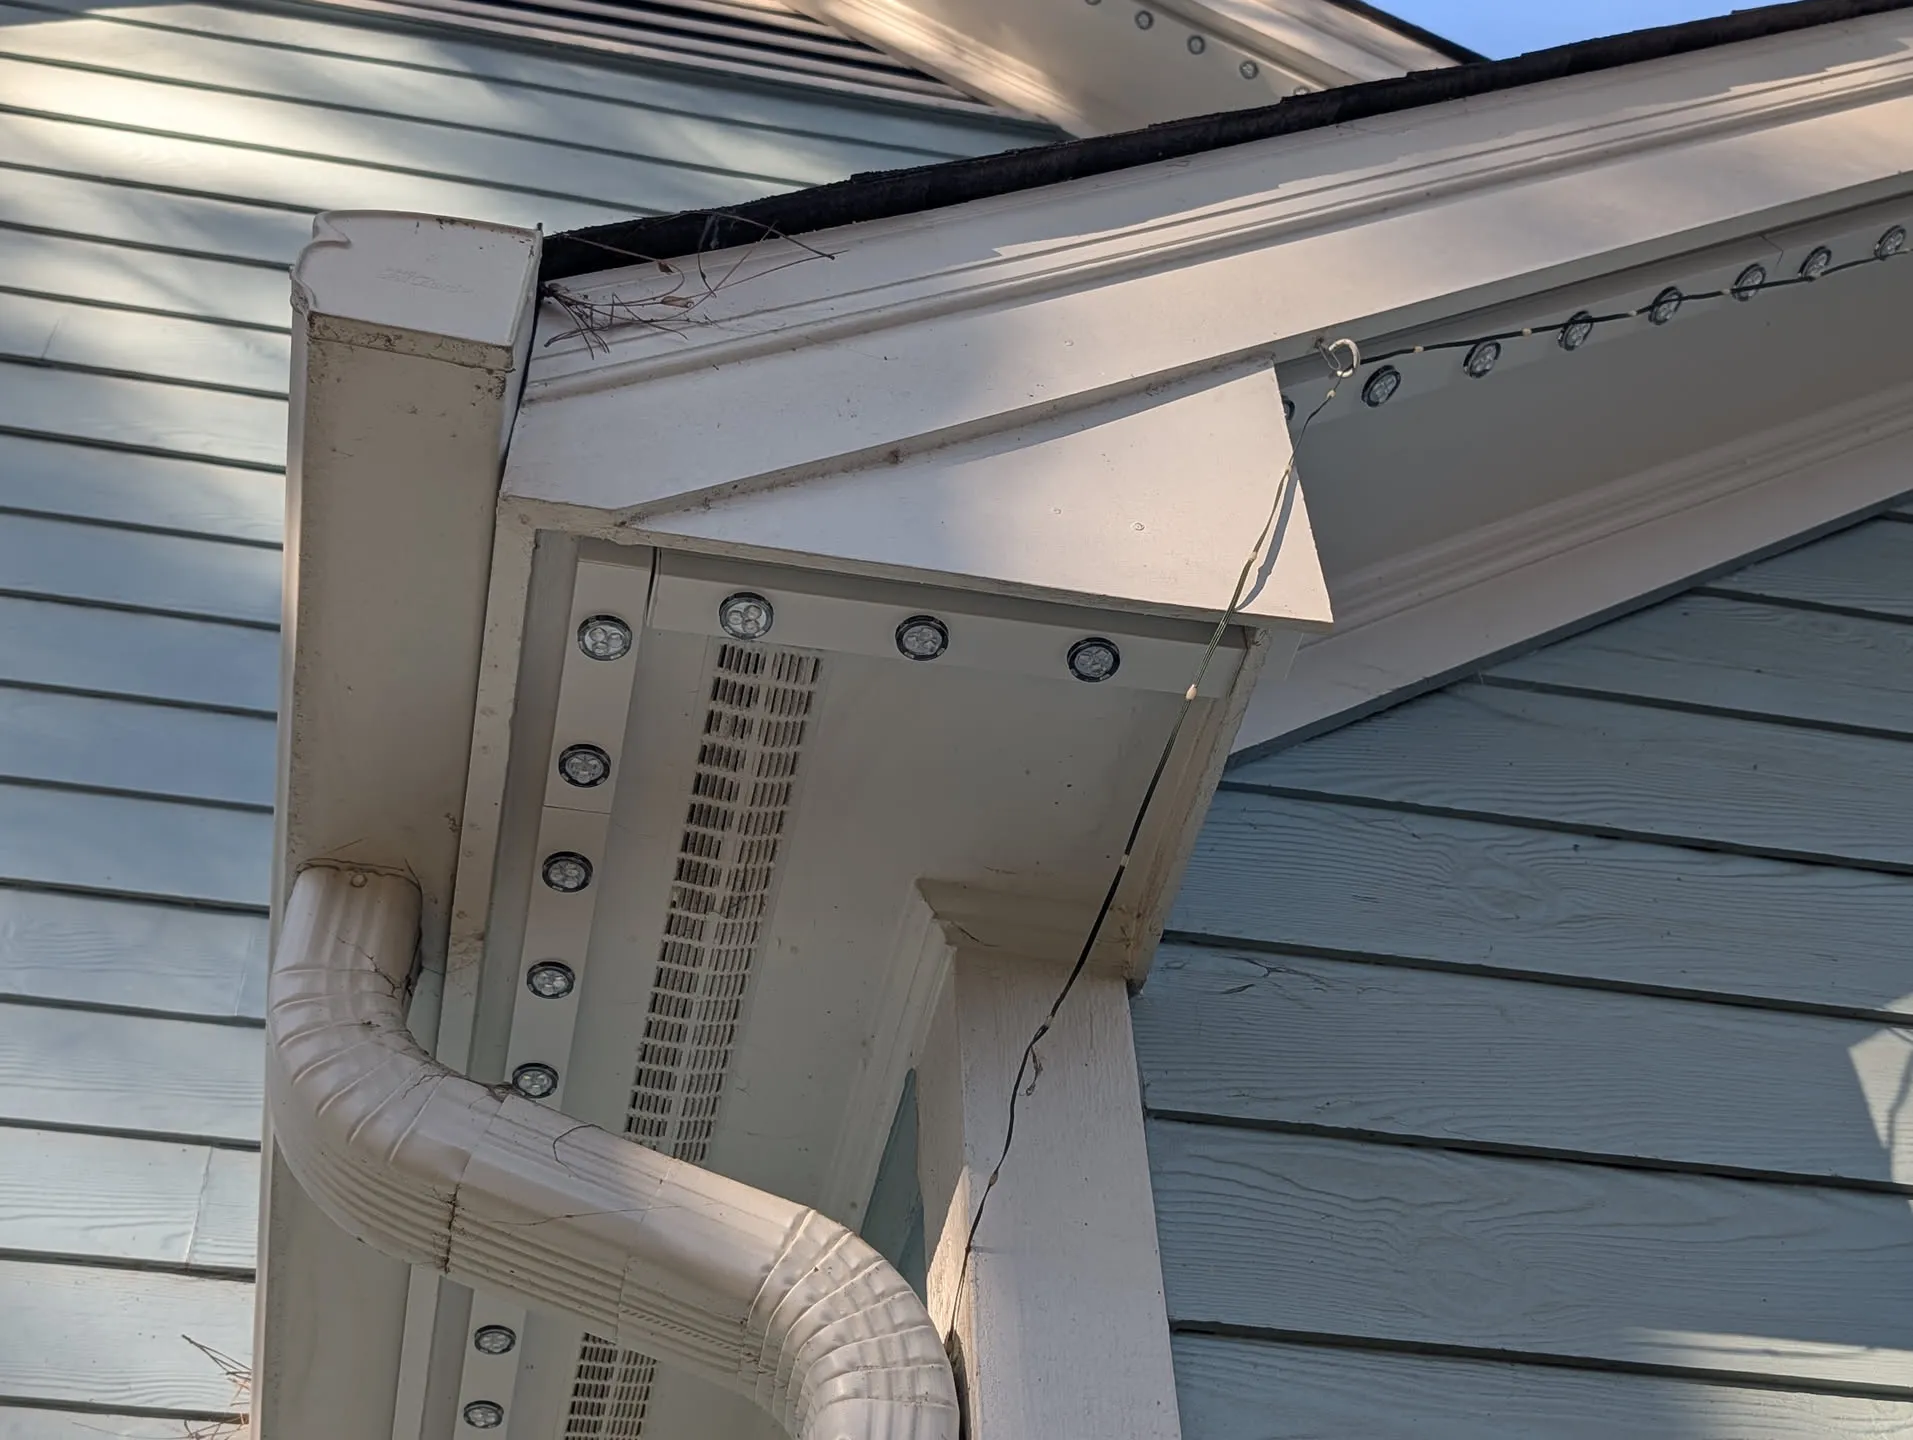
A Real-World Problem
Imagine a track run that:
Passes behind a downspout
💡
Quick tip: Normally to install a puck track I'd attach the xConnect, then lift the puck track up and snap it in to the base.
Well... if you do that next to the downspout and then try lifting the track in to place, you'll find that the wire doesn't have enough slack to get it behind the downspout anymore. You now have to disconnect the xConnect, pass it behind the downspout, then connect it again. It's simple but very annoying. I wish I could say I only made that mistake once...
Requires a short piece to reach the end before…
Turning a horizontal corner
Continues only a few more lights
Then transitions through the soffit to a horizontal track for a few more lights
Then has a miter cut and transitions to an angled track going up a peak
Hypothetical made real. My roofline is filled with these.
🙈
Don't judge me too much for the state of things in this picture. The random tiny string of lights are my old ones and I was still in the process of removing them when I took this picture. And I'm cleaning the soffits, gutters, and fascia while I remove the string, so things will look much better when I'm done. ANYWAYS...
This single area forces decisions about:
Where track cuts are allowed (have to make sure the face track is cut in the right place)
Whether puck spacing still works after cutting
Whether wires will physically reach and bend
How you’ll connect lights through these transitions
This is why tracks, lights, and wiring have to be planned together once you get beyond simple straight sections.
Now let’s discuss how I worked around all these items.