Summary: Most mistakes happen at transitions, not on long straight runs.
🛑 This guide is a major work-in-progress. There are missing details, missing pictures, missing articles, and it isn't properly organized in a lot of places. I'm continuing to update it daily, but I've decided to publish what I have so the community can start giving input.
This page was last updated: December 19, 2025 @ 3:01 PM
💦
We're going to dive in head first because it will make the pages after this one easier to follow.
I was struggling to decide what order to discuss things in... there's a lot of circular dependencies when it comes to cutting and installing the tracks and wiring the lights. It isn't difficult, but you need to be thinking several steps ahead before you begin. I decided the best way to talk about it is to go right to the hard parts first, then work backwards.
Corners, Transitions, Measurements
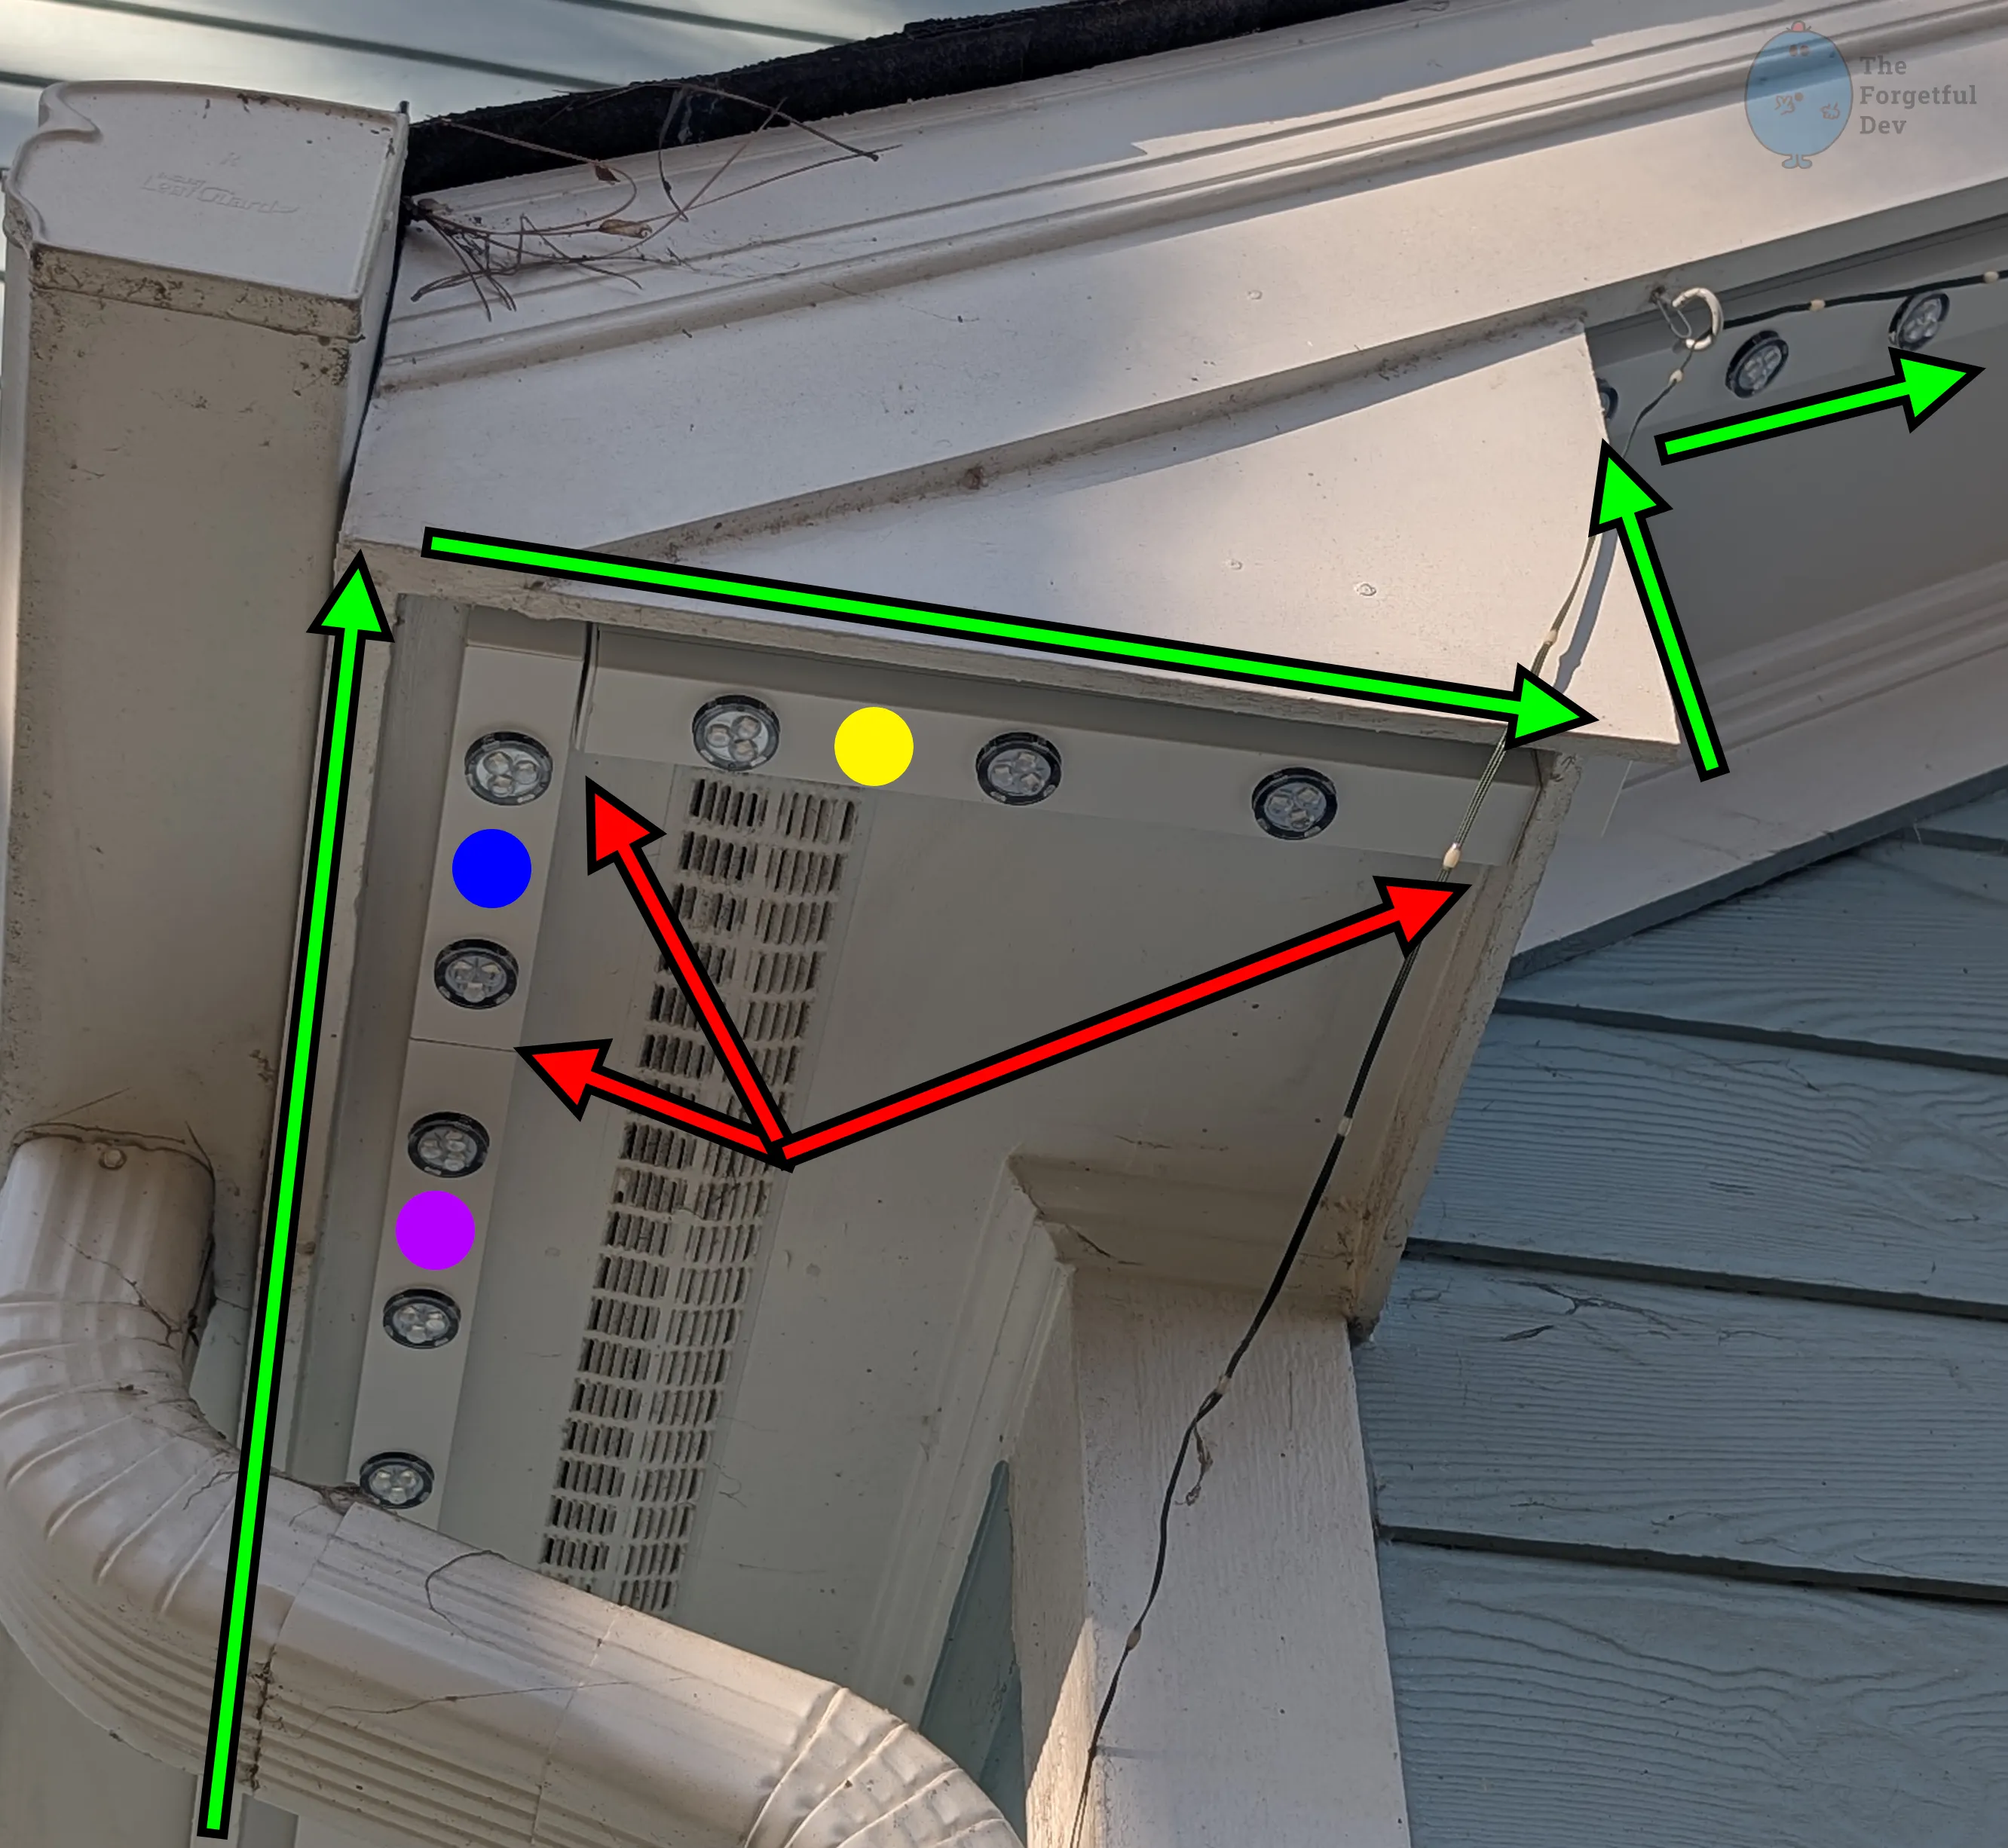
Back To Our Example From Before…
Trust me… it makes will make sense.
I know it looks a bit crazy, but this is important for helping describe things. I’ll be using this same diagram on other pages.
Green arrows show the direction this install was made in
Red arrows point out the different track cuts or transitions (some more obvious than others)
3 different color dots on the 3 track segments to make it easier to talk about them
Cutting the Track
It’s obvious that you’ll need to cut the track several times to fit these areas, and that’s easy enough. But if you just measure and cut, you may end up cutting through the opening where the puck is supposed to be installed.
Looking back at the picture: The 🔵 blue and 🟡 yellow tracks needed to be a certain length to fit, but if that length means you have to cut through a cutout in the puck track then you’re going to ruin the whole look.
📏
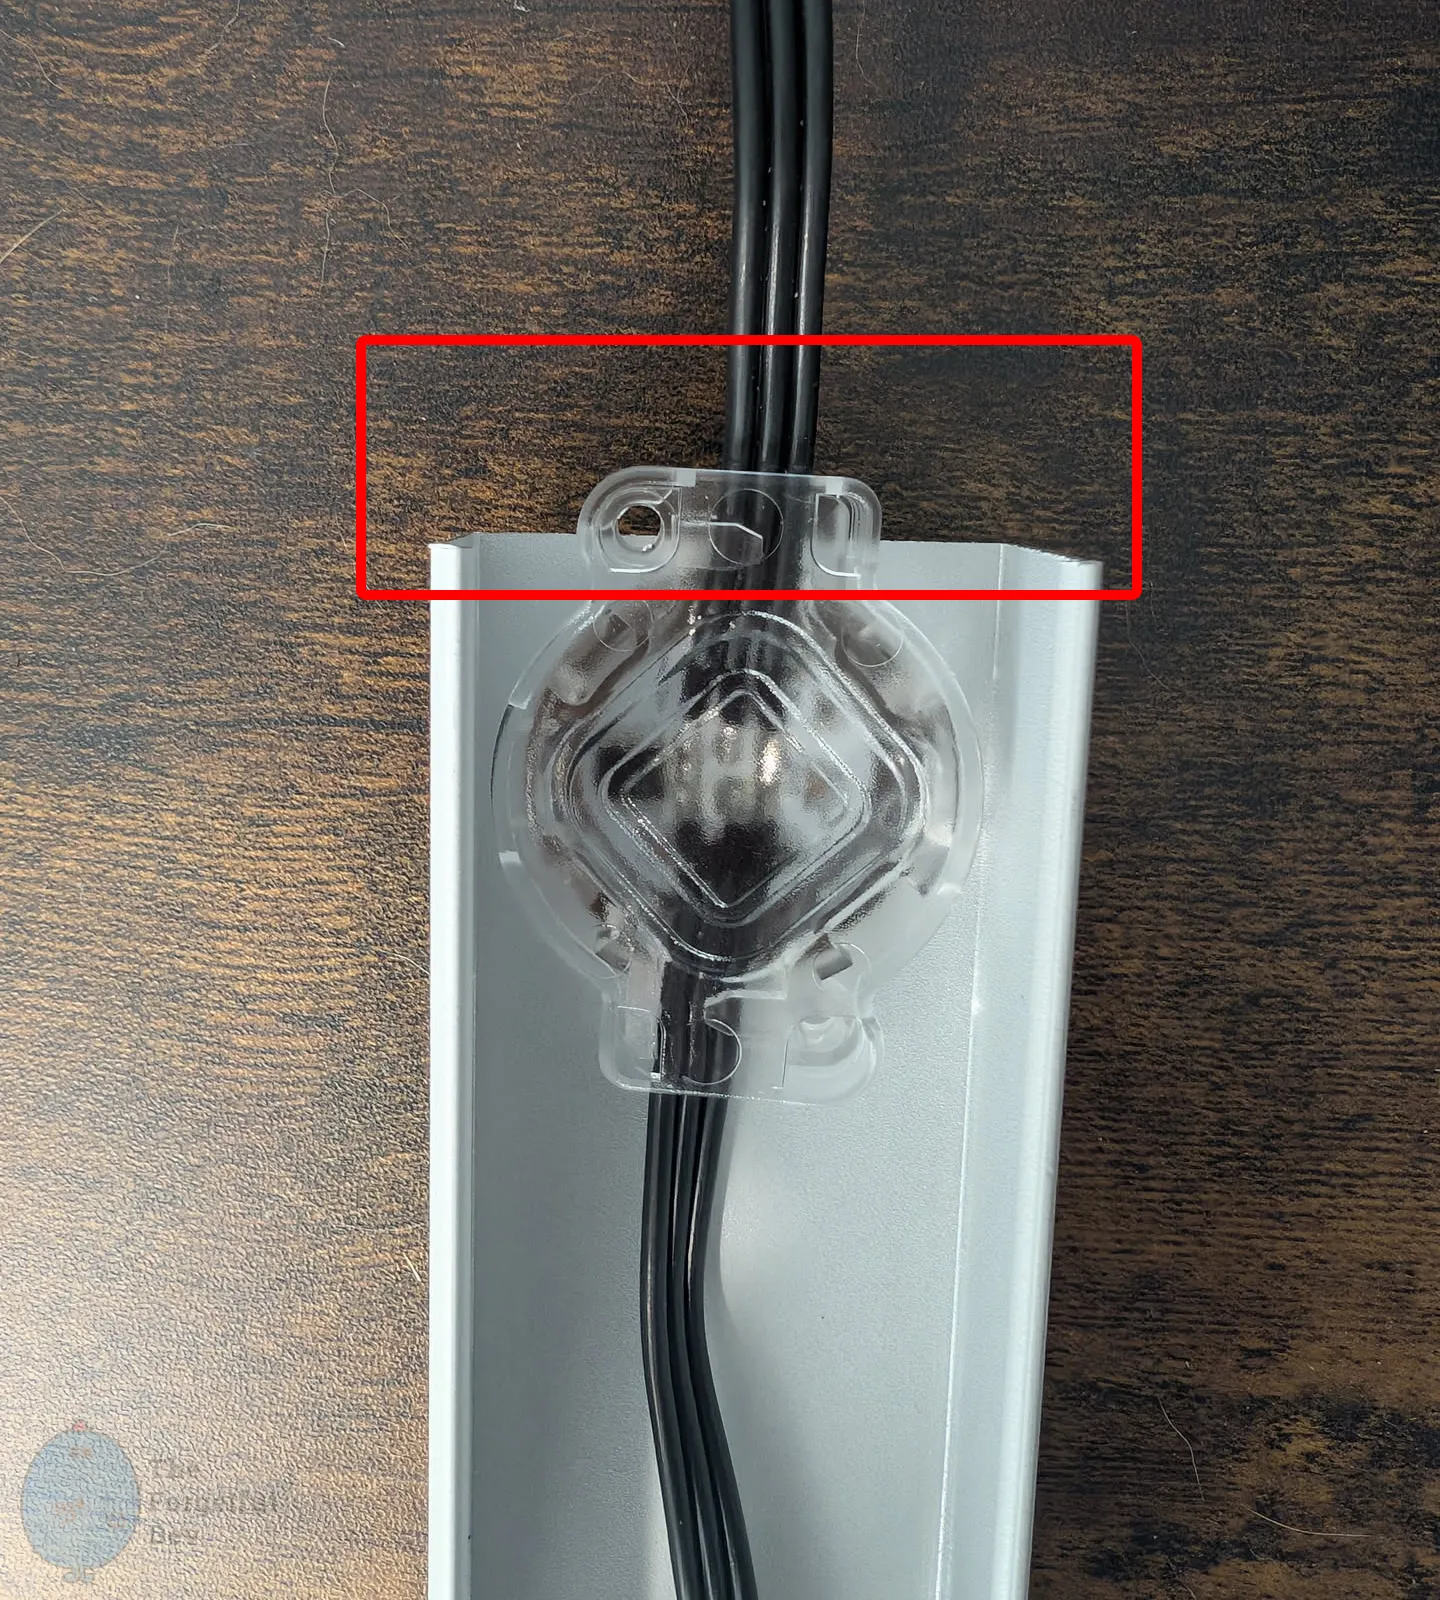
Even a cut too close to an opening won't work because the puck is wider on the inside of the track compared to what sticks through. You need room for the puck and the wire coming off of it to fit inside the track.
Make sure you have about 20mm (3/4") of additional track after a puck opening to fit the puck and wire cleanly. More is better though.
The opening wasn’t cut through, but the puck sticks out past the end because it was cut too close.
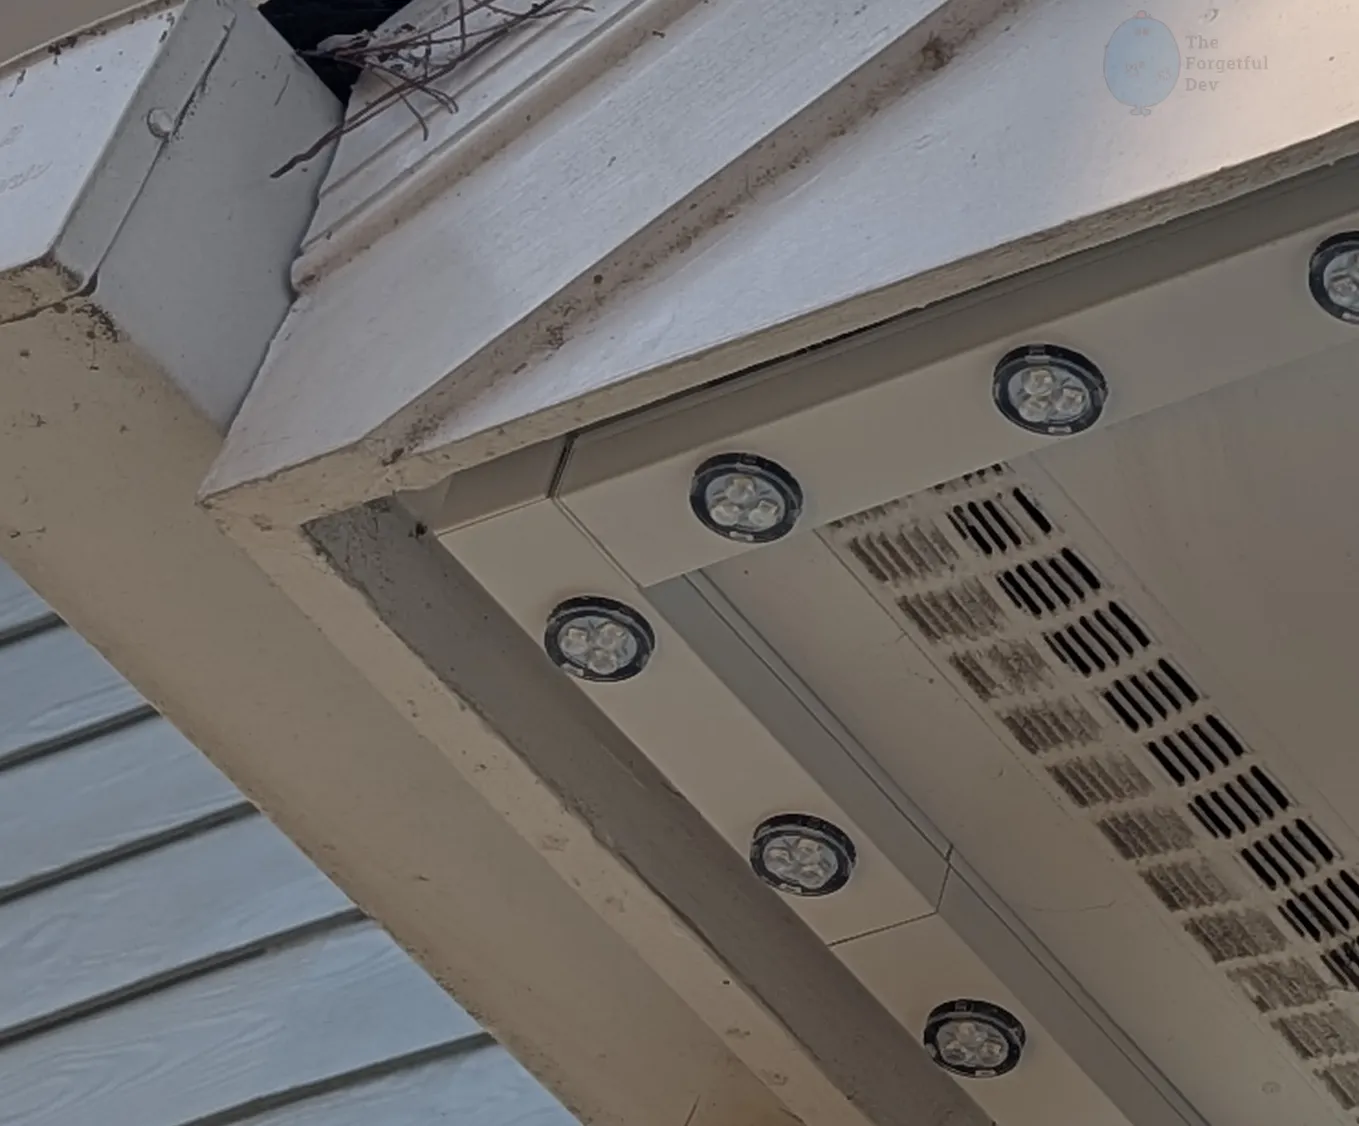
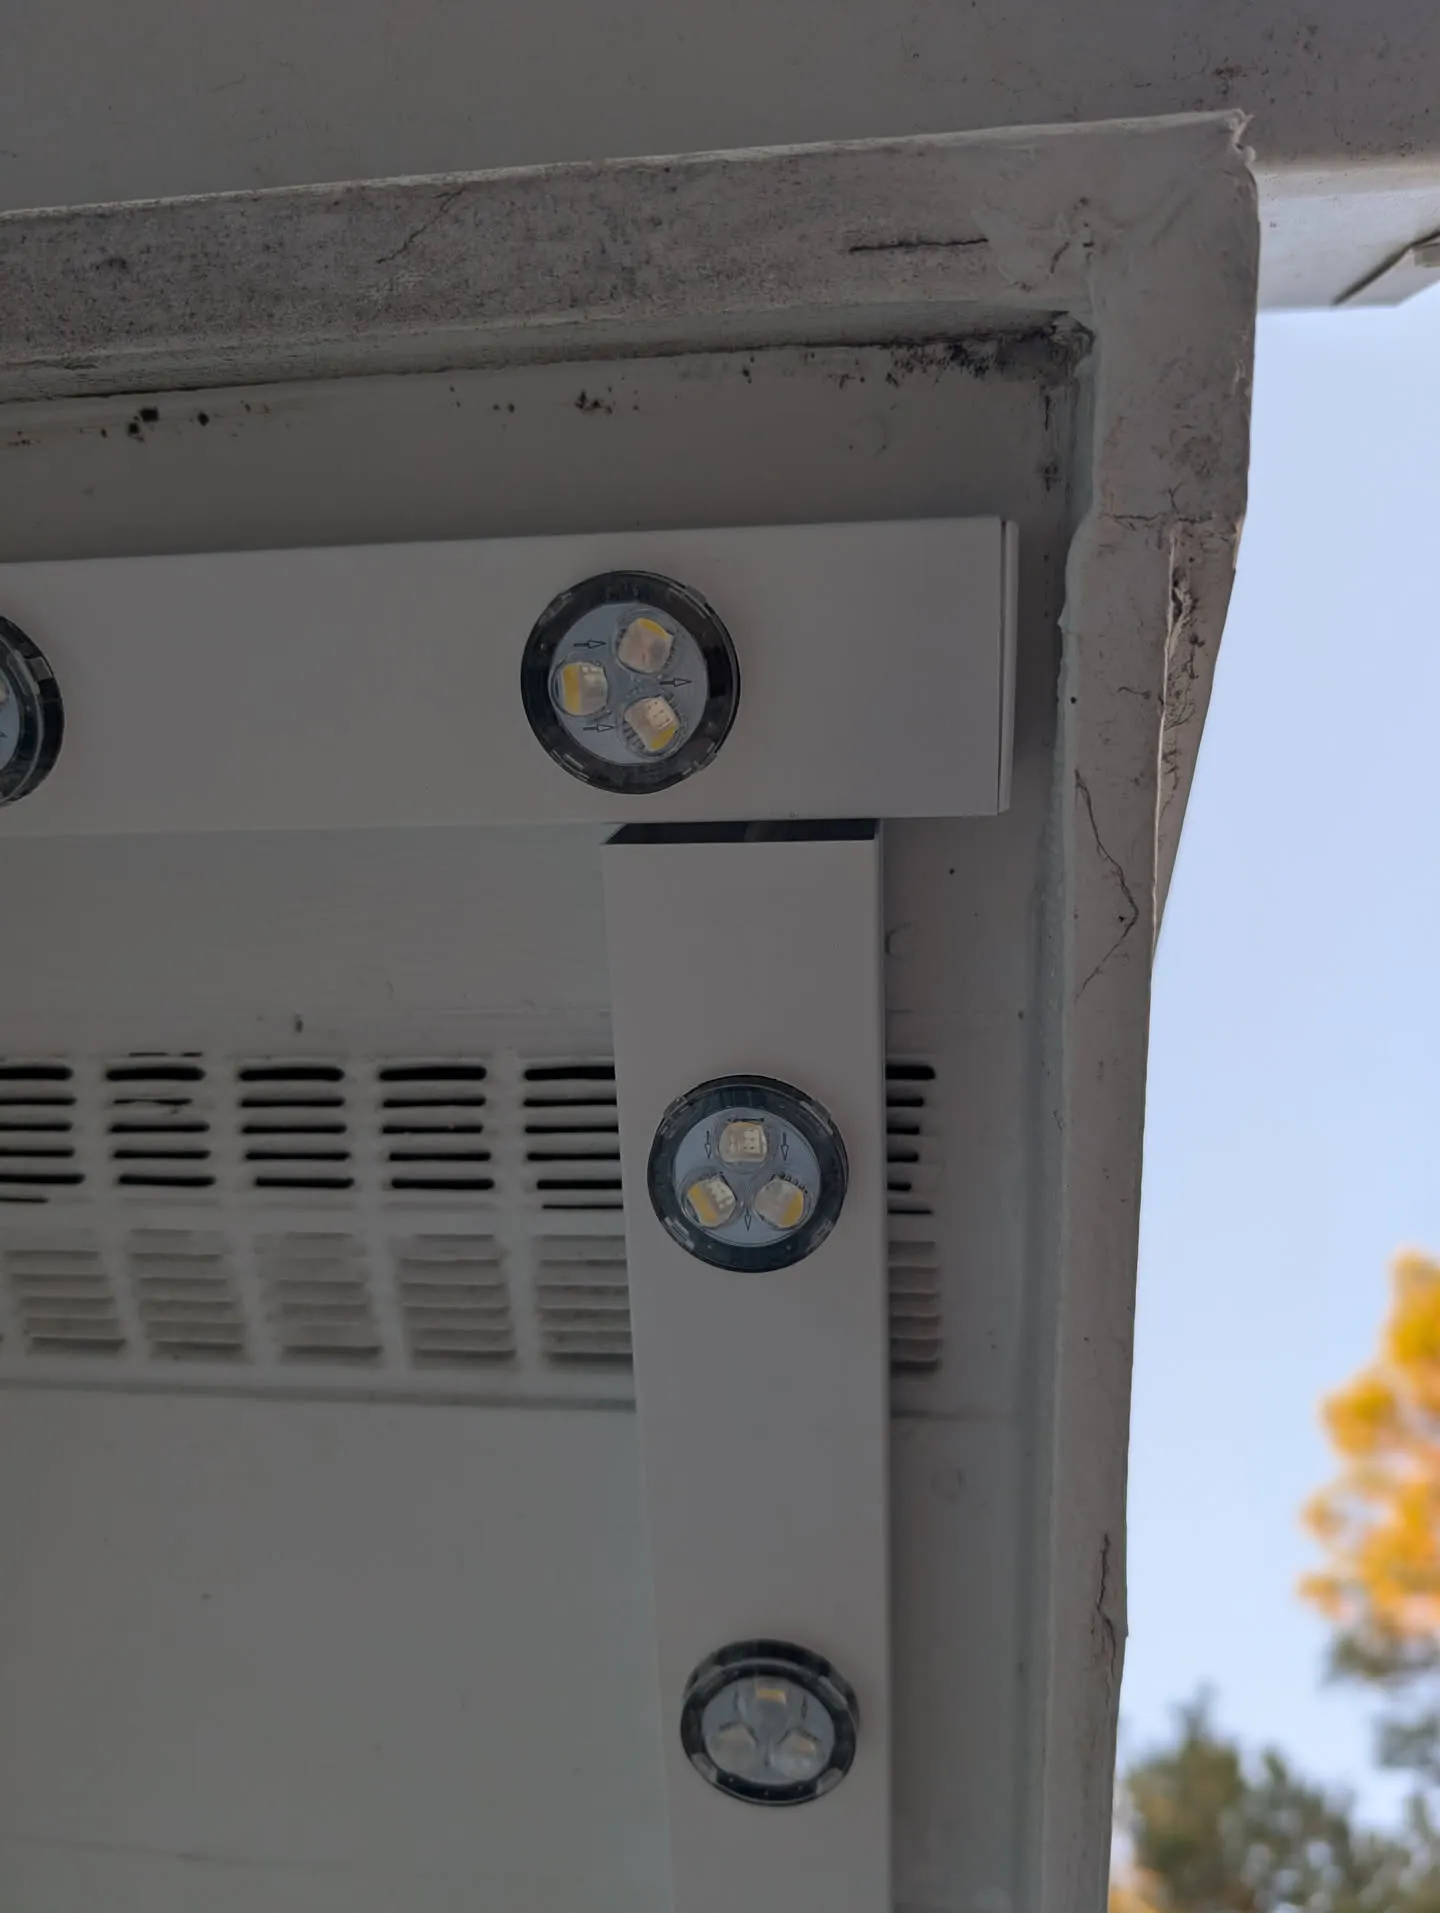
Why Butt Joints?
Mitering looks great on paper. Well they also look great in person when done correctly.
In reality though, you have to be perfect or you may make things look worse.
A gap in the miter stands out more than no miter at all
That means you have to cut the angles exactly right, align them perfectly, and install them with no room to fudge them in to place.
There is no wiggle room on your track lengths. To keep the gap between your fascia and track location even, your miter cut has to end at EXACTLY the right location. That means you’ll likely have to sacrifice somewhere else to make it all work.
If having miters is important to you, I would highly suggest starting at your corners and working out from there.
Instead of trying to miter, just butt two straight cuts together.
Ignore the dirty soffit &
Using a butt joint will:
keep puck spacing consistent
allow you to run the track a little long or short to make the install work
allow for way more forgiveness
For most installs, this tradeoff is worth it.
Another Example
Example of running it long.
The main thing I want to show in this picture is that I was able to run the track a little long while still maintaining my planned gap between the lights and the fascia. Putting a miter here would have cut into the puck at the top of the picture.
I also want to acknowledge that this section is far from perfect. I should have cut the top track shorter and gotten a nice corner like in my first example. But that actually helps me prove my point: butt joints give you a lot more wiggle room. (I’m also missing an end cap on the bottom track in this pic which is why there’s a visible gap between the 2 tracks; I added one later).
Of course if you want this to be a miter then like I said above, make sure you start in a corner with the miter first and work your way out. It isn’t hard, it just takes more planning and fiddling. Don’t forget to consider areas where you may have multiple different corners that you’re starting at and how they’re all going to meet up somewhere.