Title here
Summary here
Summary:
The guide for homing your printer could have been much shorter, but I’m hoping people use these guides to learn just as much as they do to accomplish something. I also could have made the guides 100x longer and gone in to much more detail, but I want people to actually read them instead of saying “this is way too much!”
We’re finally close… let’s slide in to home.
printer.cfg matches how we ended the bed movement guide.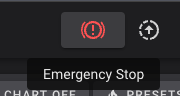
The standard homing gcode command is G28. The issue with using the default command is the way THE 100 needs to home is different from the norm. This is because we use sensorless homing on all 3 axis, and because we use part of the homing process to ensure the dual Z motors are equal so that the bed is level.
To override the default G28 behavior, we have to add a few custom macros to our printer.cfg. I’m going to just include the macros and steps to install first, and later I’ll explain how they work.
Open your printer.cfg and scroll to the bottom. Paste the following below the last line
##### HOMING MACROS START #####

[gcode_macro G28]
rename_existing: G280
gcode:
  M80
  SET_KINEMATIC_POSITION Z=0
  G90
  G1 Z5 F200
  SENSORLESS_HOME_X
  SENSORLESS_HOME_Y
  SENSORLESS_HOME_Z

[gcode_macro SENSORLESS_HOME_X]
gcode:
    SENSORLESS_DELAY
    # Home
    G280 X
    # Move away
    G1 X{ printer.toolhead.axis_maximum.x/2 } F6000

[gcode_macro SENSORLESS_HOME_Y]
gcode:
    SENSORLESS_DELAY
    # Home
    G280 Y
    # Move away
    G90
    G1 Y{ printer.toolhead.axis_maximum.y/2 } F6000

[gcode_macro SENSORLESS_HOME_Z]
gcode:
    SENSORLESS_DELAY
    # Home
    G1 X{ printer.toolhead.axis_maximum.x/2 } Y{ printer.toolhead.axis_maximum.y } F6000
    G280 Z
    SET_KINEMATIC_POSITION Z=1
    G1 Z0 F120
    G1 Z5 F120
    SENSORLESS_DELAY
    G280 Z
    G1 Z5 F120   # Make sure we clear the toolhead
    G1 X{ printer.toolhead.axis_minimum.x +5 } Y{ printer.toolhead.axis_maximum.y -2 } F6000


[gcode_macro SENSORLESS_DELAY]
gcode:
    # Pause to ensure driver stall flag is clear
    G4 P2000

[gcode_macro M80]
gcode:
  SET_STEPPER_ENABLE STEPPER=stepper_x ENABLE=1
  SET_STEPPER_ENABLE STEPPER=stepper_y ENABLE=1
  SET_STEPPER_ENABLE STEPPER=stepper_z ENABLE=1

##### HOMING MACROS END #####
Then click Save & Restart.
The time as finally come to home for the first time! I would highly suggest two things before continuing:
Press the 🏠 All button in fluidd, or send G28 via the console. Be prepared to hit Emergency Stop if needed!
If all goes well then your printer should follow these steps:
Your printer is now homed!!
position_endstop settings in your printer.cfg and they ultimately don’t actually matter. If you followed my guide then they SHOULD be going to the right and to the back, but as long as position 0,0 is in the front left corner of the bed then it doesn’t actually matter.Now that your printer is homing correctly, let’s get the other components working. Or continue reading if you’re interested in what the macro does.
Coming soon. Focusing on moving the guide forward for now. Ping me in discord if this is important to you and I’ll work on it.