If you don’t have experience with Raspberry Pi type devices (a single-board computer, aka SBC) or with Linux then this is potentially the first place you’ll run in to trouble. A lot of people will follow these steps and it will work great, while others will follow them verbatim and run in to issues. The good news is that unless you’re truly doing something wrong, you are definitely not the first person to run in to the issue and help is out there.
This process isn’t unique to THE 100. Klipper is used on countless devices, and Raspberry Pi type devices are used in infinitly more. But it does require needing to be somewhat comfortable in a command line environment if you run in to trouble.
Requirements
A BananaPi M2 Zero (aka the SBC) as recommended in the BOM. THE 100 will absolutely work with with a different SBC, but you won’t be able to follow the steps exactly.
An SD card. I HIGHLY you purchase a quality SD card rather than using a cheap offbrand one. Cheap flash memory could work fine, or it could be the source of constant gremlins that are impossible to chase down. If you find that you have things working and then suddenly they stop… the SD card is the most likely culprit. A basic 32GB SanDisk ultra can be bought for about $5 on Amazon and will save you so many headaches.
A wifi antenna for BPi. It will not connect to the internet without one.
A computer and SD card reader. The current guide was written using macOS, but I’m working on one for Windows. The steps for a Linux-based computer should match the macOS ones.
A micro USB to USB A cable that supports data. Some cables are charging only.
A micro USB to USB C cable (or cable with adapter) that supports data. Some cables are charging only.
Prep the SD Card
Download Armbian_21.08.1_Bananapim2zero_bullseye_current_5.10.60.img.xz from an armbian archive
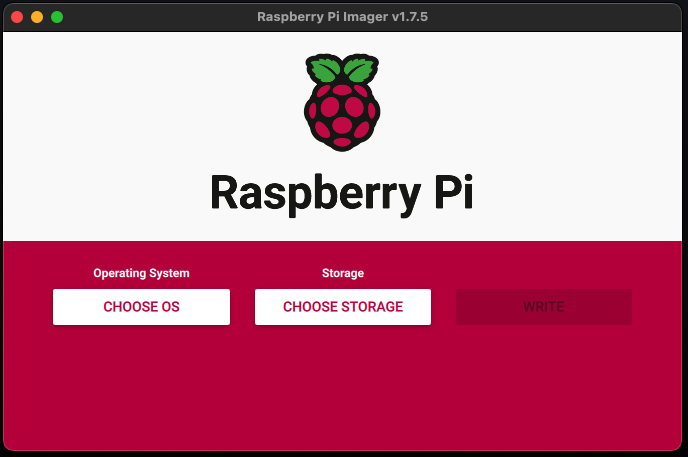
Select CHOOSE OS > Use custom > select the Armbian_21.08.1_Bananapim2zero_bullseye_current_5.10.60.img.xz file you downloaded earlier (no need to extract it or anything)
Click CHOOSE STORAGE and select your SD card
Click WRITE
ℹ️ The Imager gives you settings you can preconfigure if you click on the gear icon, but they don’t actually work in my experience. Don’t waste your time.
If you get a warning about applying custom settings, say NO
When warned that all data will be erased, say YES (I’m assuming you made sure you’re clearing the correct SD card… :))
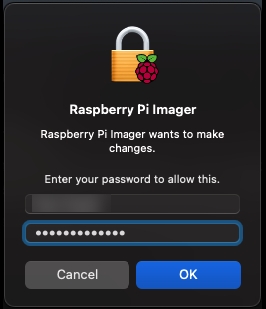
You will need to enter your computer’s password for the write to proceed.
After the write completes (takes a few minutes) you may get a warning that says The disk you attached was not readable. As long as the Raspberry Pi Imager shows the write was successful then this errors is expected; you can click Eject. If the write wasn’t successful, you may have a bad SD card.
First armbian boot (macOS)
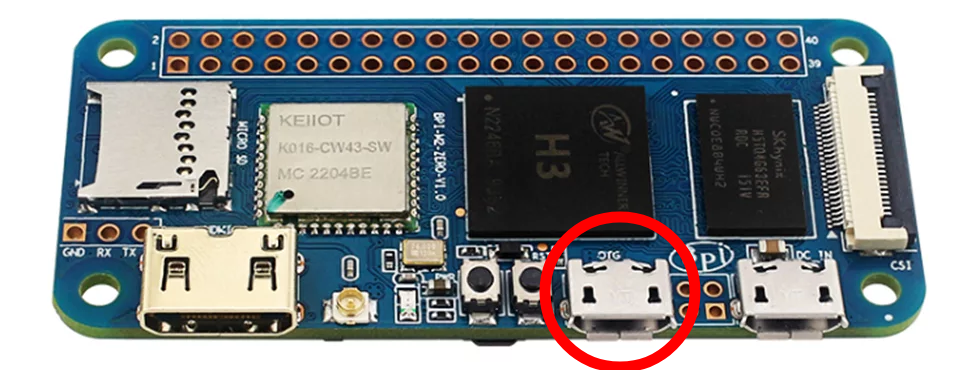
Insert the SD card in to the BPi. Then plug a micro USB cable in to the OTG plug on the BPi (it’s the port closer to the middle; see screenshot below), and the other end in to your computer.
Within 20 seconds the red light on the BPi should start blinking. Wait until that point to proceed.
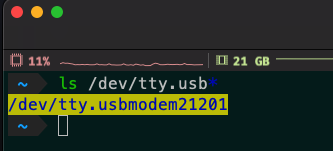
From terminal on your mac, type ls /dev/tty.usb* to get a list of attached devices. This should reveal a device that looks similar to /dev/tty.usbmodem21201. Copy that string to notepad before continuing.
ℹ️ If you don’t get a response to the ls command, make sure you’re using a USB cable that supports data and also make sure you’re plugged in to the OTG port on the BPi.
Open a connection to the BPi by typing screen /dev/tty.usbmodem21201 115200
You need to replace /dev/tty.usbmodem21201 with the string you found in the step above. Do not change 115200 at the end of the string.
ℹ️ If you get a blank screen and you can’t type or do anything, you should try a different USB cable and try connecting to a different USB port on your computer. The only time I’ve seen this is when I was using a USB hub or cable that didn’t properly support this type of connection.
You should now see a prompt for the BPi M2. It should look like what you would see if the BPi was connected to a monitor.
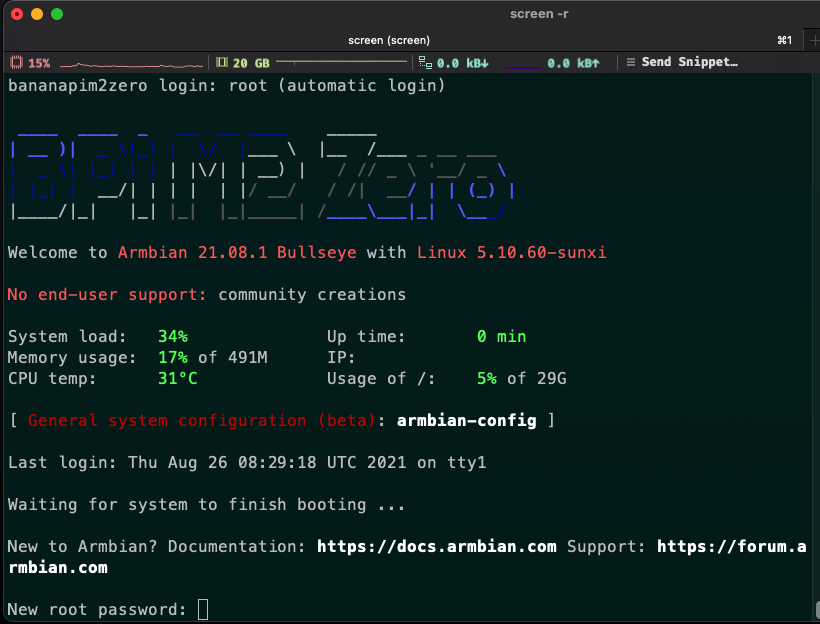
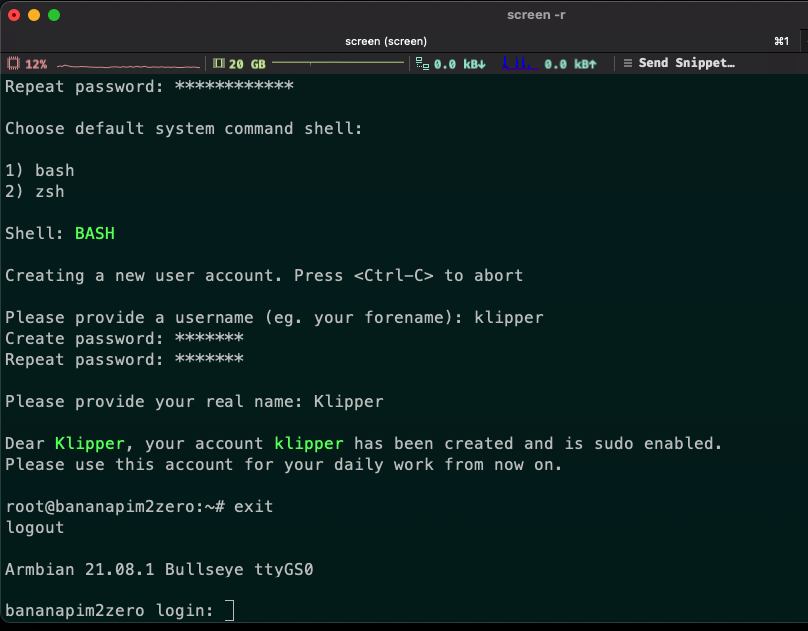
Set the root password by typing a password twice
It will warn you if it isn’t secure enough and make you type it again
Type 1 to select bash as your default shell
When prompted to provide a username, enter klipper. Then enter a password for the klipper user.
You can leave the real name as Klipper when prompted
Type exit to log out of the root user. You should now be sitting at a login prompt.
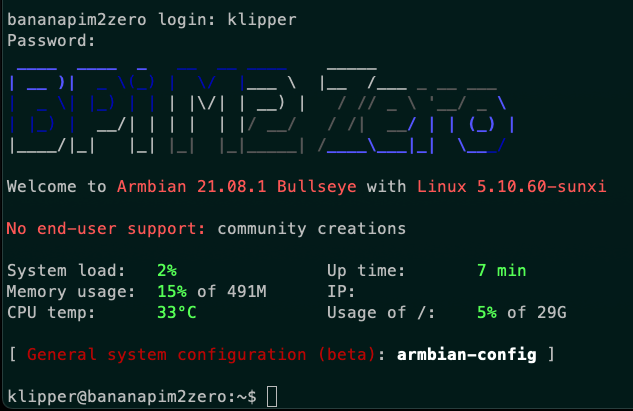
Enter klipper as the user, and the password you set for the klipper user. You should now be logged in as the klipper user.
Setup wifi
Prior to continuing, you should be logged in as the klipper user and sitting at a prompt that says klipper@bananapim2zero:~$
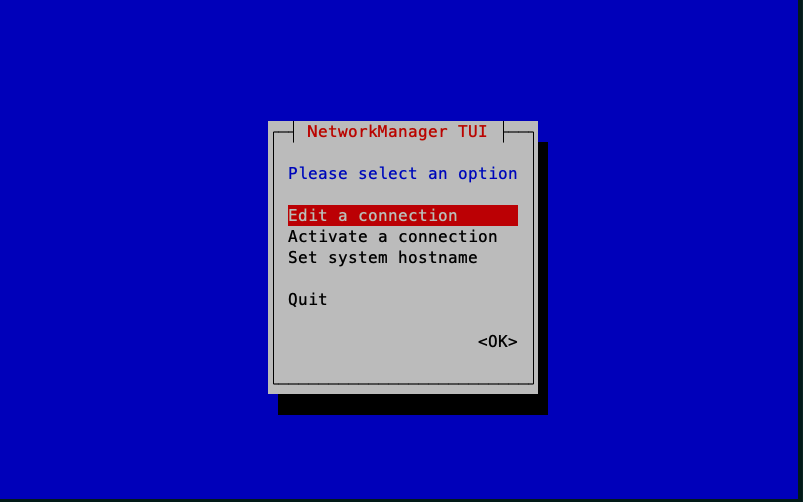
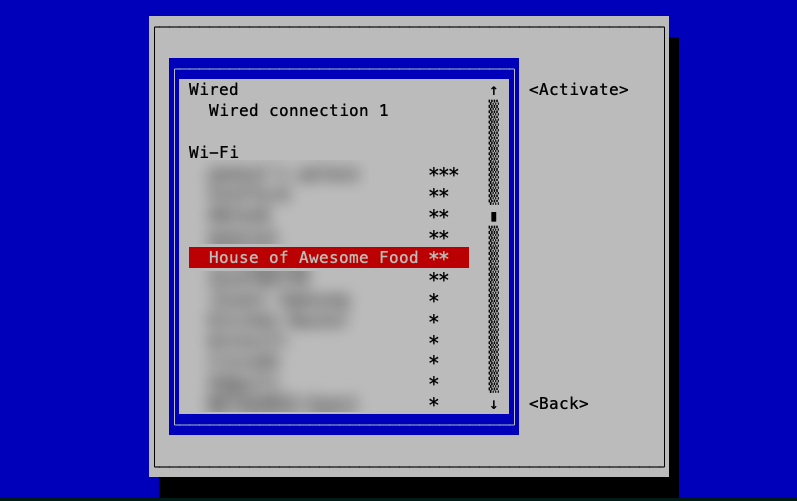
Type nmtui and press enter to launch the Network Manager
Arrow down to select Activate a connection and hit enter
Arrow down to your wifi SSID and hit enter
ℹ️ If you don’t see any wifi access points, you likely don’t have the BPi antenna connected. In my experience you MUST have the antenna to proceed. I had a high powered wifi AP sitting 10 feet from the BPi and it couldn’t find it.
This is my neighbors ssid, I just thought the name was funny
Enter your wifi password when prompted
If things worked as expected you should see a * in front of your ssid. And if you arrow down to it so it’s highlighted, the button on the top right should now show Deactivate.
Press tab until you get to <Back> and hit enter
Arrow down to Quit and hit enter
Type /sbin/ifconfig wlan0|grep inet to see the IP address that your BPi was assigned
Mine is 192.168.1.120
ℹ️ It would be smart to set a static IP as this one is assigned dynamically and is likely to change. I won’t be covering how to do that in this guide.
Connect via SSH
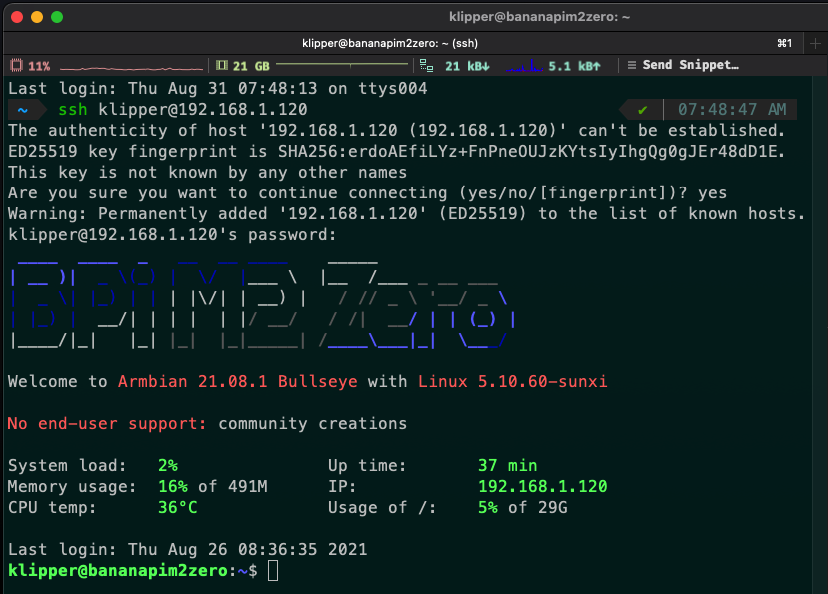
Open a new command prompt/terminal on your computer (it’s important you don’t do this in the BPi terminal) and type ssh klipper@192.168.1.120 (but replace my IP with yours that you found in the step above!)
If you receive a prompt asking you if you’re sure you want to continue connecting, type yes and hit enter
Type the password you created for the klipper user above
You should now be connected to the BPi via ssh!
Shutdown
From this point on it’s important that you don’t just unplug your BPi without properly shutting it down (unless you have no choice). It is a computer and simply unplugging it can often lead to corruption or other issues.
Type sudo shutdown now
You will likely see a prompt telling you that you’re trusted and to follow 3 things. This is because sudo is giving you admin access to the BPi
Enter your klipper user password when prompt and hit enter
Your ssh connection should drop and the LED on the BPi will be solid red. It is now safe to unplug.
If you got this far then armbian is setup then your user is setup, the device is online, and you’re ready to continue! Let’s get klipper setup.