Title here
Summary here
A friend of mine is setting up his first unraid server and I’ve been going along for the ride. I’ve been giving him some help and tips along the way.
He recently asked me how to setup URLs for the various services he’s running which brings us to the next entry in what is becoming an unraid series.
The focus for this post is on using Nginx Proxy Manager (NPM) internally in your network. This will give you a way to have easy-to-remember URLs for your services, but more importantly it will front all of those services with an SSL certificate. This isn’t critically important for security when everything is internal to your network, but it will prevent you from getting https errors/warnings all over the place.
I’ll be writing this with the assumption that you’re using unraid with docker and using Cloudflare for DNS. However, there is still a lot of detail in here that doesn’t require those things. If you’re just here looking for help with Nginx Proxy Manager then you’ll still benefit from reading through it.
You will need to have your own domain name though.
Install Nginx-Proxy-Manager-Official from community apps in unraid
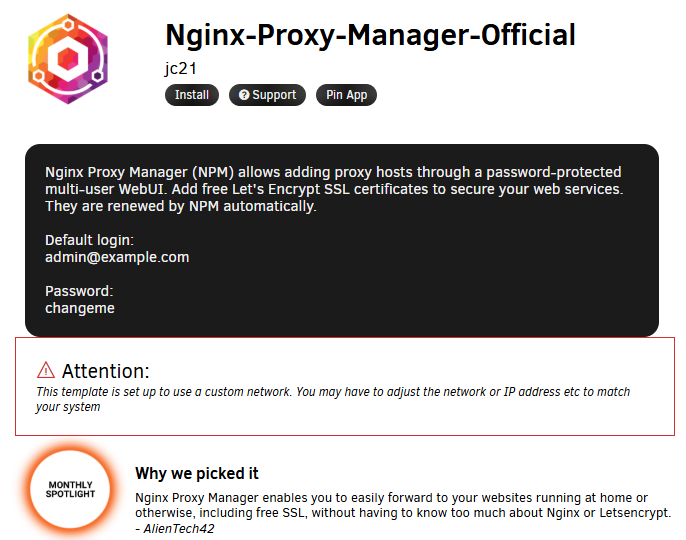
Aside from optionally setting the IP address, you shouldn’t have to make any changes to the template as long as this isn’t your first docker container on unraid. Just click Apply to deploy it.
Custom : br0 instead of bridge which is the typical default. That means this container will get its own IP directly on your network rather than use the IP of your unraid instance. The benefit of this is you don’t have to worry about port conflicts with the unraid web gui itself. I would recommend setting an IP in the Fixed IP address field.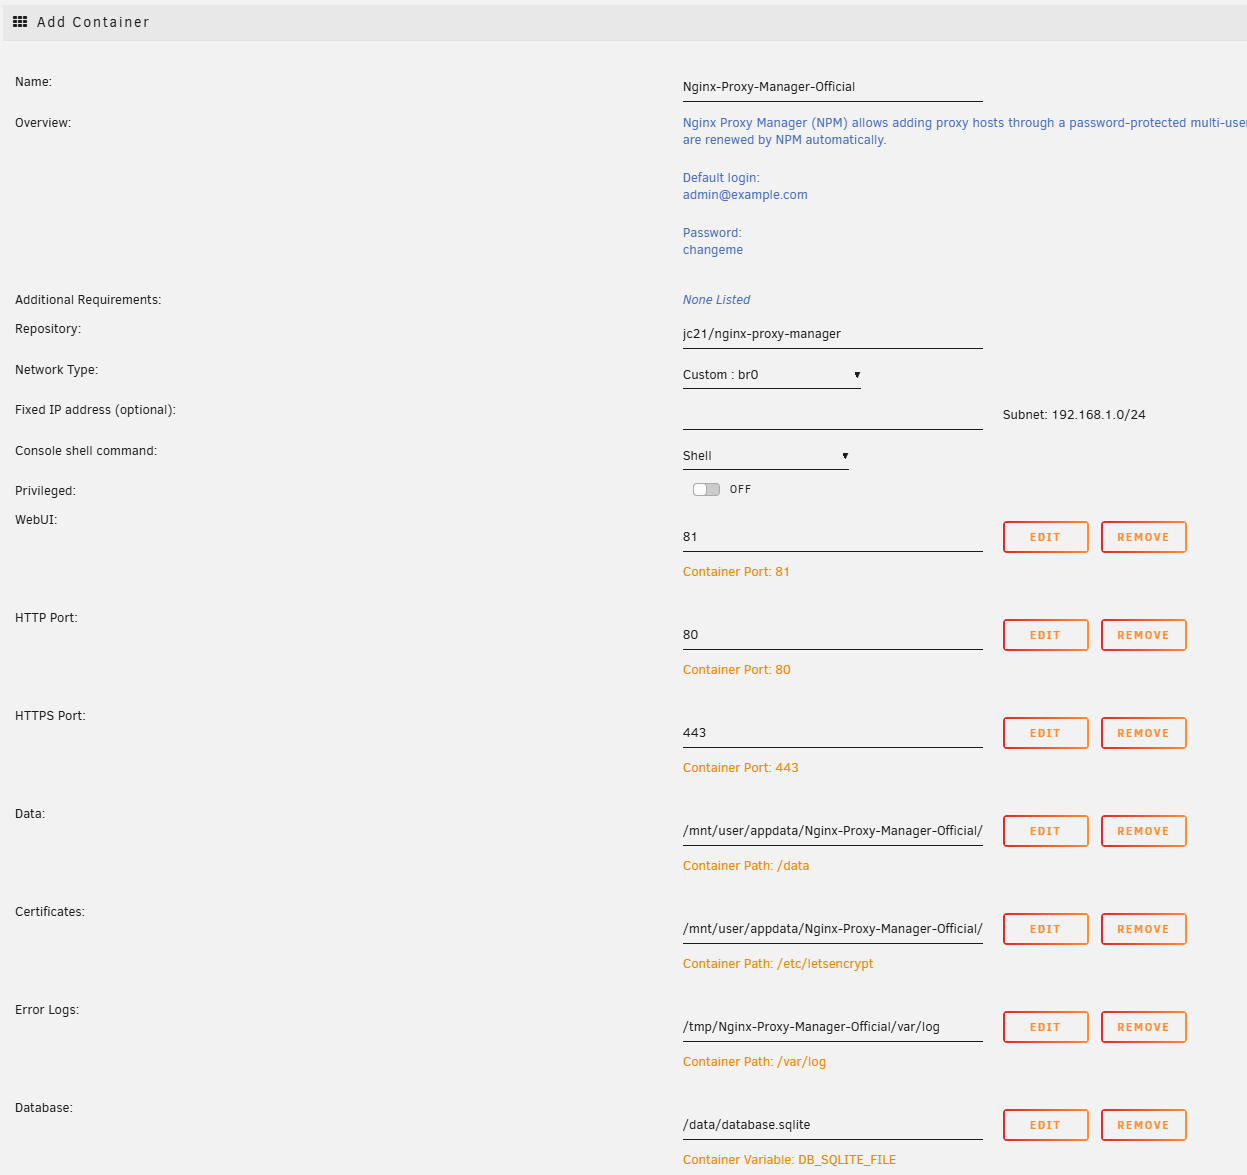
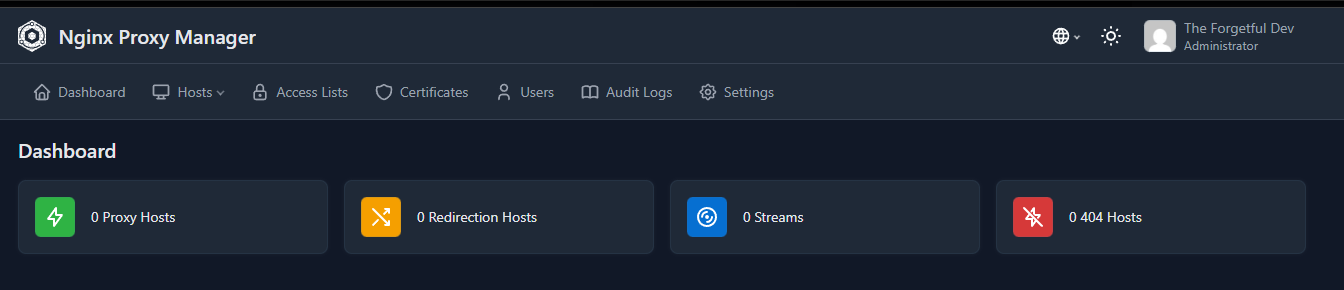
You should now be able to go to http://[ip-you-set]:81 and you’ll see the Welcome! screen from NPM and you’ll be prompted to create the admin account.
After creating your account and logging in, you’ll be on the main dashboard and ready to continue.
Now that NPM is up and running, we need to create a wildcard certificate and then add proxy hosts.
You can technically have NPM generate 1 cert for every host you add, but I found that to be excessive. Instead of doing that, I just create a single wildcard certificate with my domain and then use that same one over and over.
As mentioned at the start of the article, the assumption here is that you have your own domain name and the DNS for it is managed by Cloudflare. NPM supports countless different DNS providers though so you can absolutely continue even if this article focuses on Cloudflare. The important part here though is that you’re using a provider that supports getting a certificate via a dns-01 challenge. That way we can get a certificate without ever having to open up our NPM instance to the internet.
From NPM select Certificates at the top > Add Certificate > Let's Encrypt via DNS

For the Domain Names field you’ll want to enter *.yourdomain.tld.
theforgetful.dev then you’ll enter *.theforgetful.devSelect Cloudflare from the DNS provider list (or select your provider if you’re using something else)
Enter your Cloudflare API token in the credentials file field in the format of dns_cloudflare_api_token=YOUR_TOKEN and click Save
Zone:DNS:Edit permissionManage Account > Account API tokens > Create TokenUse template next to the Edit zone DNS optionZone Resources section.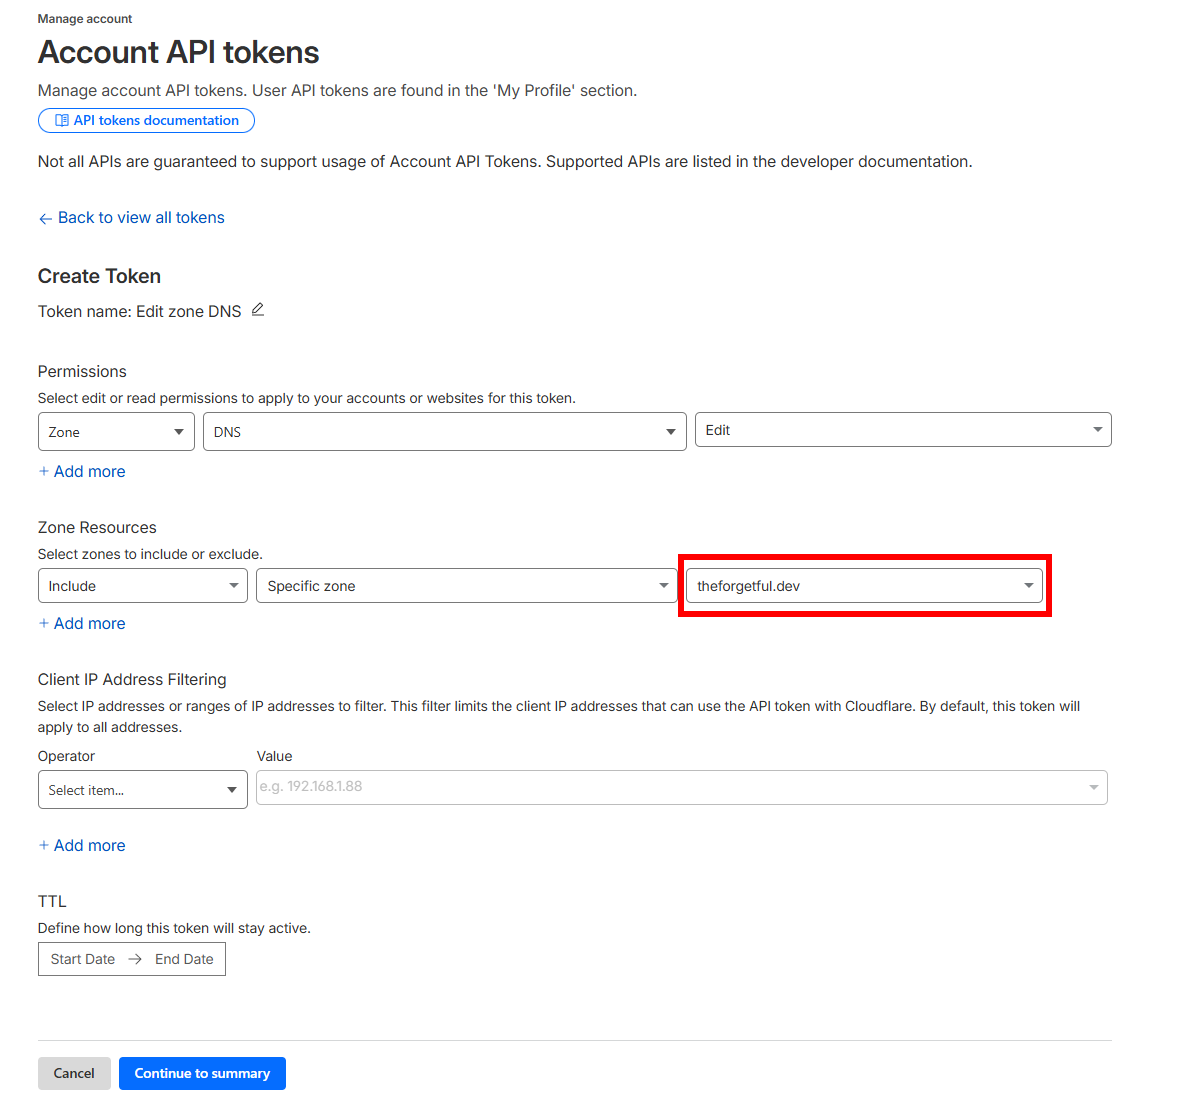
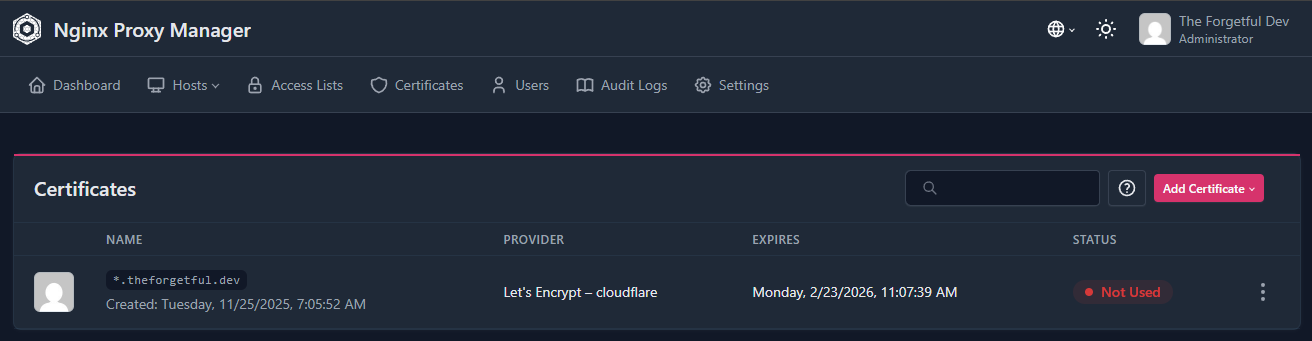
Continue to summary and then Create Token. Your API token will then be displayed. Make sure to save it somewhere safe so you can reference it later.After you click Save you’ll see the button spinning for a while, about 10-15 seconds, but as long as it completes successfully then you’ll be taken to the list of certificates. You’ll see a warning status of Not Used but that’s ok because… we haven’t used it yet.
The time has come to actually create a proxy host. I suppose I should explain what’s even happening here and what we’re doing.
Nginx has been around since 2004 and is a lightweight web server that also supports reverse proxying. NPM (Nginx Proxy Manager) was created as a nice GUI to manage the configs for it. The purpose of us using NPM and a reverse proxy is to give us clean and easy URLs with automatic SSL certificates. A reverse proxy sits in front of the service you’re trying to access and essentially relays the conversation between a browser and the service you’re trying to access so it’s also a great way to safely expose services to the internet, but that’s outside the scope of this article as there’s 100 other considerations you need to make before choosing to do that. We’re only going to be using it inside our network.
Alright, let’s add a host! For this example we’re going to setup a proxy host for openvscode-server, but these same steps would apply for any service you want.
Hosts > Proxy Hosts from the toolbar at the top of NPM, then click Add Proxy HostDomain Names field. A format of service.yourdomain.tld is a common and easy-to-remember format.code.theforgetful.devhttp.
Publicly Accessible.Block Common Exploits and Websockets Support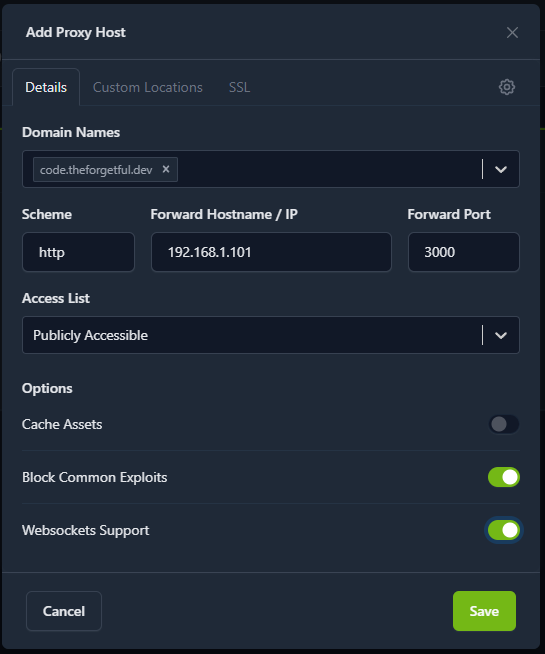
Force SSL and HTTP/2 Support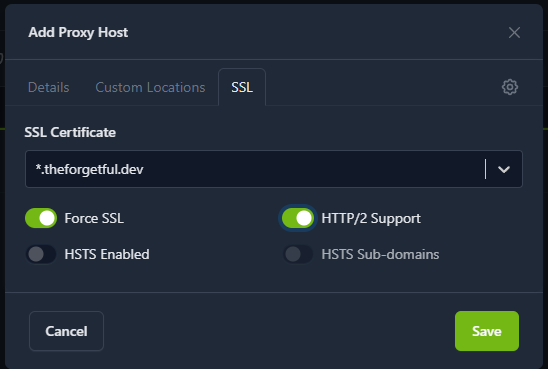
Save. As long as you did everything correctly then you should see your new host listed, see that it’s protected by SSL, and see that it’s Online (note: this isn’t doing any kind of check to verify it’s actually online, it just means that it’s active.).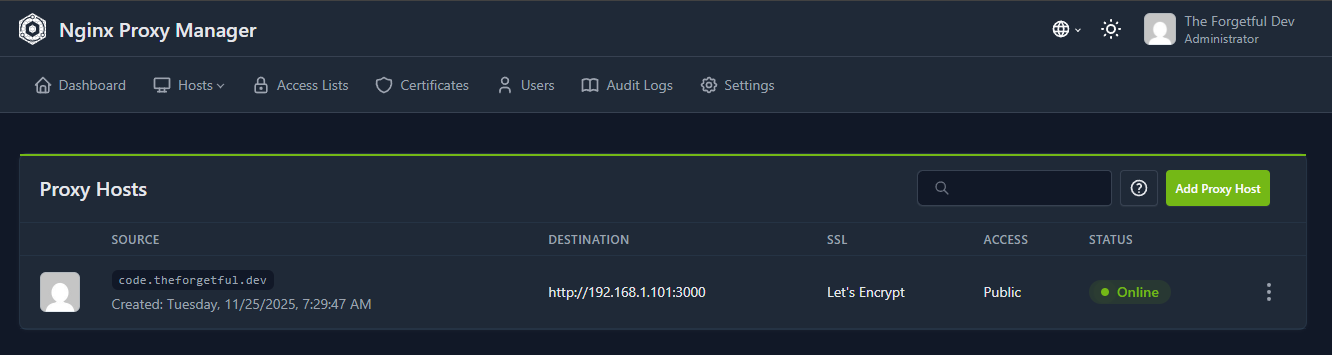
We’re so close! But I won’t actually be able to go to code.theforgetful.dev in my browser yet because it isn’t in DNS.
This section is a little bit more hand-wavy because it completely depends on what you’re using for DNS within your network. Keep in mind that this is different from DNS for your actual domain name.
I won’t go in to a ton of detail here but if you aren’t sure what DNS is, the simple explanation is that it’s like a phonebook (wait… do people even know what phonebooks are anymore?). When you type a domain name in to your browser, a DNS server will tell your browser what the IP is so that your browser can pull it up. In practice the way that works is your browser will first ask your internal DNS server for the IP of that website. If your DNS server doesn’t know it, it goes up the chain of parent DNS servers until it finds the one with enough authority to answer it.
What we need to accomplish is that when you go to service.yourdomain.tld, your internal DNS server points you to the IP address for NPM. Even if you aren’t running your own dedicated DNS server internally, you potentially have the ability to add custom entries on the modem/router/firewall provided by your ISP. If you can’t even do that, and you don’t want to setup a DNS server, then you can always add the entry to the hosts file on your computer. But that only works for your exact computer, and not every device (like phones and tablets) will support that. I’m also not going to go in to details on how to do any of this because it varies wildly.
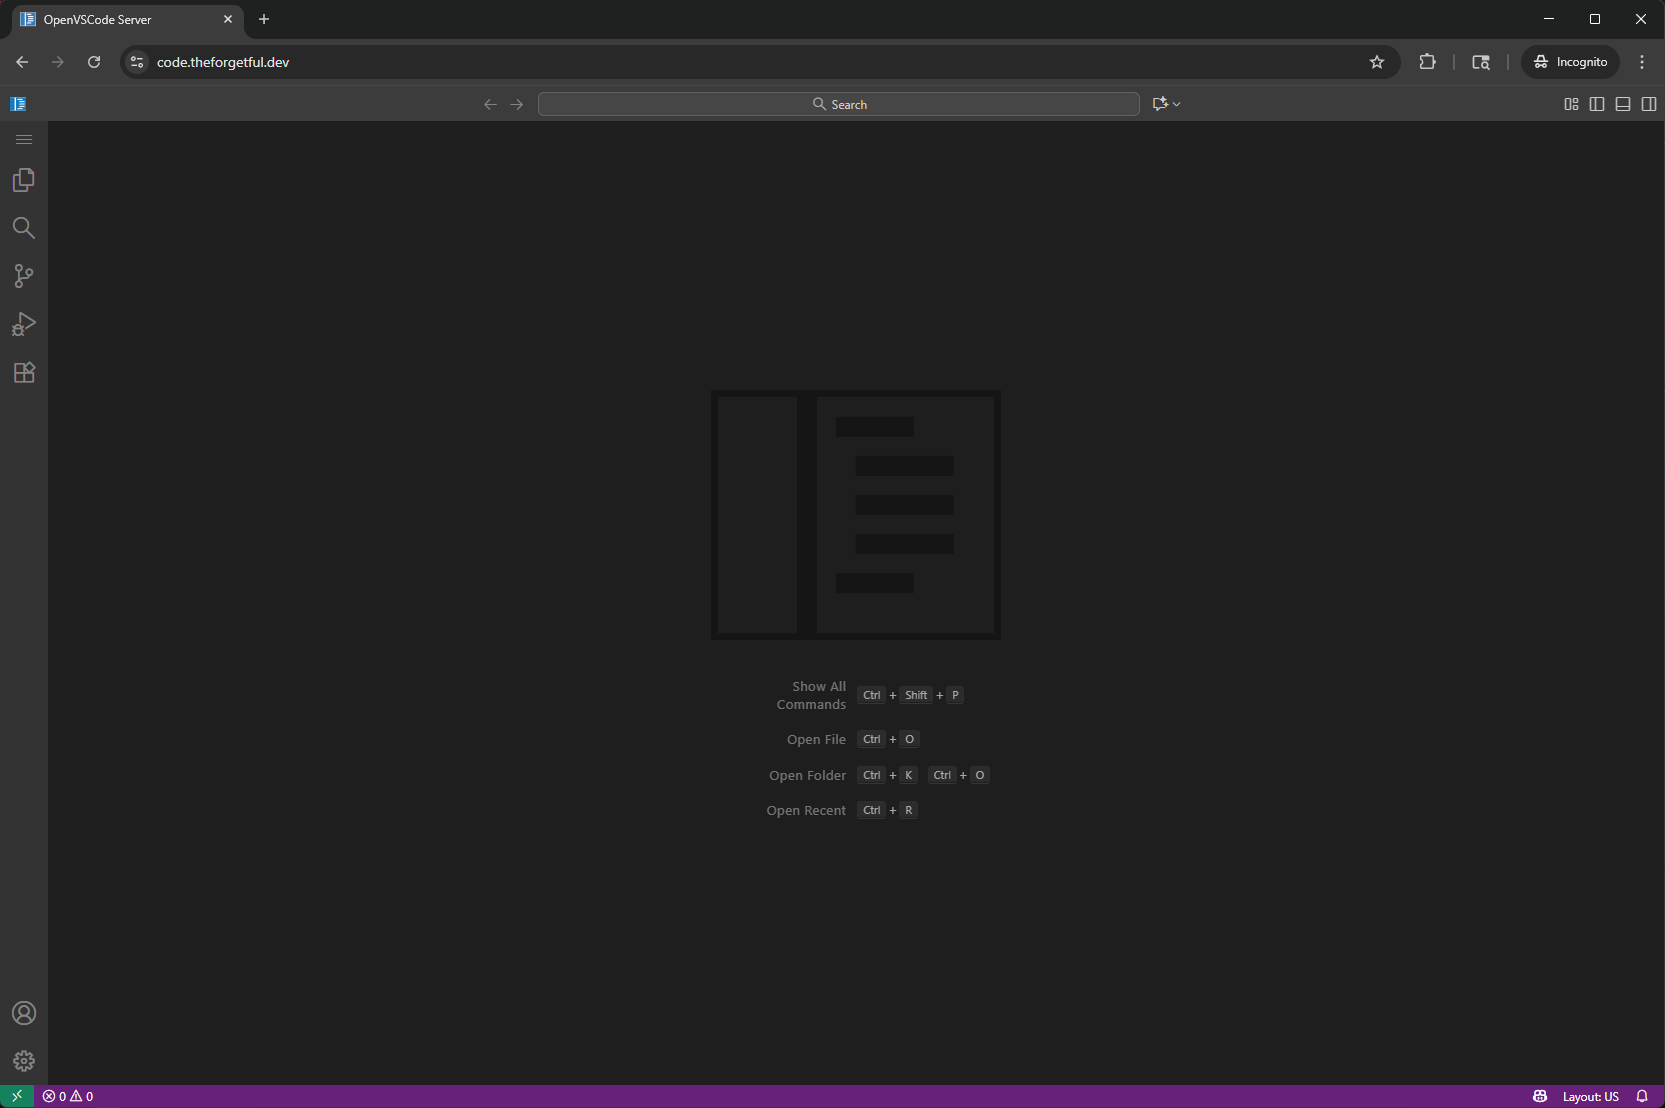
So like I said… hand-wavy. 👋 We need to add a DNS entry via whatever method you’re using so that your newly created subdomain is pointed to the IP address for NPM. For my demo that means code.theforgetful.dev needs to point to 192.168.1.1. For me that’s done on my Pi-hole through System > Settings > Local DNS Records.
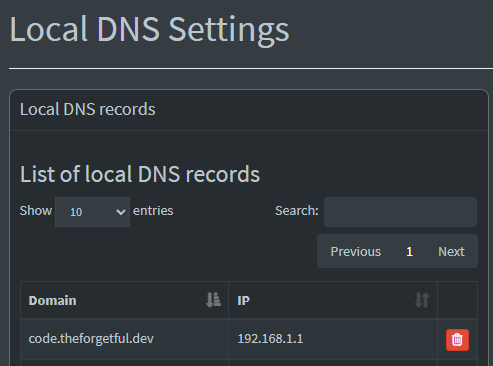
And just like that, I’m now able to browse to code.theforgetful.dev and access vscode-server! And because we’re using NPM with a reverse proxy and SSL cert, we don’t receive any https alerts or warnings from the browser.